Showing posts with label Beef. Show all posts

Monday, January 16, 2012

Me Gusta Taco Melts!

Know what's super pathetic? I had to go to free translation to make sure that I spelled "Me gusta" or "I like" correctly before posting this blog. Clearly that four years of Spanish in school served me well.


But, this recipe really is "muy bueno" and best of all incredibly simple to make. Ever since I started my grown up real world job (all of ten hours ago) I have been scouring the Internet for easy to make, weeknight meals that are tasty and do not break the bank. I tested this one out over the weekend and it comes from Pillsbury and is called Grands! Easy Taco Melts. This is my first recipe from the major supplier of all things doughy and I have to admit, I was a bit skeptical at first. I hate recipes that push products (obviously they are going to push their name brand of "Grands", but does it really make a difference if I use Old El Paso Thick n' Chunky Salsa? I think not. Also, I just thought it was going to plain suck, sort of like making the equivalent to a fast food dinner. I was proven wrong, deliciously incorrect, on both counts. Here is the easy recipe:

The Dough Boys. Photo from www.pillsbury.com
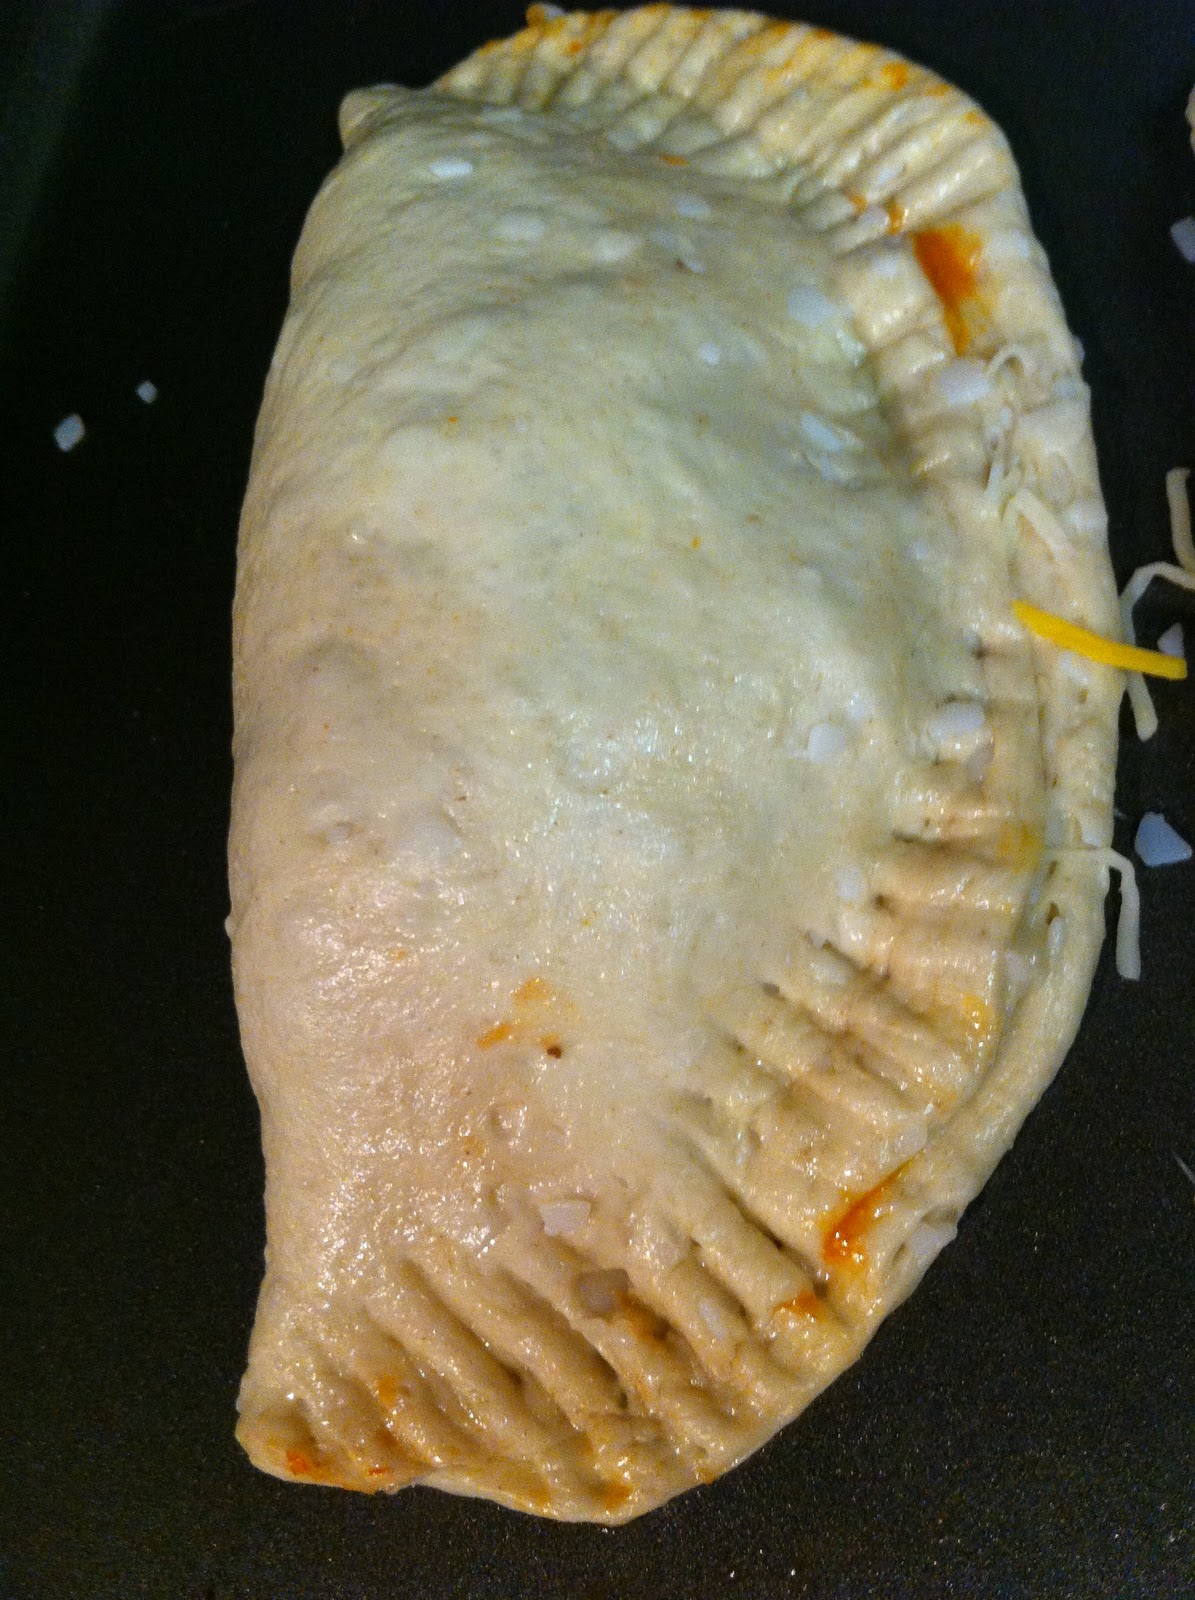
Mine
Grands! Easy Taco Melts
Makes 8-10 Melts

INGREDIENTS
1 lb lean (at least 80%) ground beef, cooked, drained
1 1/2 cups Old El Paso® Thick ‘n Chunky salsa
1  can (16.3 oz) Pillsbury® Grands!® refrigerated biscuits
1/2 cup shredded Monterey Jack cheese or Mexican cheese blend (2 oz)

DIRECTIONS

1. In 10-inch nonstick skillet, mix cooked beef and 1/2 cup of the salsa. Cook over medium-high heat, stirring occasionally, until hot.


Brown the meat. Add the salsa. Easy Peasy!

2. Press each biscuit into 6-inch round. Spoon 1/3 cup meat mixture and 1 tablespoon cheese onto center of each round. Fold dough in half over filling; press to seal. Place on greased cookie sheet.


Use a fork to press down the sides. 
3. Bake at 375°F 9 to 14 minutes or until golden brown.


Ole!
Pros: It's yummy, it requires four ingredients (well five if you count sour cream as an essential ingredient, we do in my family), and it is filling! One was plenty for me with a salad on the side and two more than filled up the men of the house.

Cons: This was really just a "Meredith is a spazz" negative, but I was pretty dismal at assembling the melts. You definitely have to make sure to flatten the dough out to the point where it is almost ripping to fit the meat mixture and fold without oozing out the meat mixture (wow that was a gross way to describe food. Sorry!)

Revisions: On principle I did not use the brand name salsa (really the supermarket brand was cheaper and a 2 for 1, I love a good deal). Also, on the side I made a salad with tomatoes and chopped red onion to compliment the melt, but next time I think I would add the chopped onion right into the melt, it would have added a nice flavor component to the dish. Even without it, it was still a hit in my house.

This is the perfect recipe for the busy man or woman (and really who isn't?) who is looking to try a new recipe that is attainable on a weeknight. It is a different take on "Mexican" night that is simple yet packs a lot of punch. Also, it holds nicely to make a great taco salad for next day's lunch, and any dish that you can get more than one meal out of is a good thing in my book! 


Saturday, January 14, 2012

I Makea Da Meataballs!: Mozzarella Stuffed Homemade Meatballs

Ok I know I am being very nonchalant about my distribution of "Hall of Fame" awards, but I've just been on a roll as of late! Continuing this trend of wins are these FANTASTIC Mozzarella Stuffed Homemade Meatballs from "The Picky Palate". These are perfect for non-Italians or shameful Italians that never learned how to make meatballs (guilty). I'm not sure if these are the most authentic of meatballs, but they truly are scrumptious and an easy way to dress up your standard spaghetti night. I mean it's mozzarella baked into a meatball! How can you lose?! Ironically, this is the same blog that brought us the Oreo within a Chocolate Chip Cookie recipe so clearly something is working here with this food within a food concept. Without further delay, here is the recipe:
Mine


Hers. Sorry I can't keep plants alive. Photo from http://www.picky-palate.com/
Mozzarella Stuffed Homemade Meatballs
2 tablespoons extra virgin olive oil
1 pound lean ground beef
1 large egg
1/2 cup finely chopped white onion
1/2 cup Panko bread crumbs (*I didn't have Panko, I just used America's Choice Bread Crumbs)
1/2 cup fresh grated Parmesan cheese (*not fresh, oops!)
1/4 cup milk
2 tablespoons minced garlic
1 tablespoon Worcestershire sauce (*I used low sodium)
1 tablespoon yellow mustard (*Didn't have it in the fridge. Used Dijon instead)
1 teaspoon hot sauce, like Tabasco
1/2 teaspoon kosher salt
1/4 teaspoon freshly ground black pepper
1/4 teaspoon garlic salt
Ten 1-inch Mozzarella balls (*Couldn't find. Used four jumbo balls and just about halved them to make 9 meatballs in total. This is also a better option if you are on a budget-Mozzarella balls are not cheap!)

1.  Preheat oven to 35o degrees F. and grease 9×13-inch baking dish with oil.

2.  Place beef, egg, onion, bread crumbs, Parmesan, milk, garlic, Worcestershire, mustard, hot sauce, salt, pepper and garlic salt into a large mixing bowl, stirring until just combined.  Take 1/4 cup beef mixture and press into center with your thumb to make room for cheese ball.  Place cheese in middle then with hands enclose the cheese with the beef, making sure the cheese is completely covered.  Place meatballs into prepared baking dish and bake for 30 to 35 minutes, until cooked through.
Mix up all those ingredients.

Meatballs! (Before the good stuff)

The good stuff is inside (Thanks hubs for making them look pretty!)
Hot out of the oven!

3.  Serve over top your favorite pasta or inside a warm roll for delicious meatball sandwich.


Check out that cheese!
Pros: As we already know from my intro they are amazing! As my husband put it, "the flavor profile is perfect" (I think someone bumped his head and thinks he's Emeril now-or he's just getting really into the blog as well :) ). Another plus is that the recipe is really easy to follow and there's lots of room for revisions.

Cons: I found it hard to figure out how big to make the balls (ok I just laughed writing that-I seriously think I am actually a fifteen-year-old boy sometimes). 1/4 of a cup didn't seem the right size to make the mozzarella fit inside the meatballs.

Revisions: All of my ingredient revisions are written in the recipe. I am a huge believer (mostly because Bethanny Frankle is-I love her-guilty!) in using what you have especially if it isn't a huge component of the recipe. For instance, I didn't have yellow mustard and I was not about to run out and buy some because 1. I'm cheap and 2. We rarely use yellow mustard. So, I used Dijon instead. Just as good.
Next, if you're sensitive to onion (or have never cut a white onion before) use a food processor or be prepared for the water works! These are definitely the crying onion.
Also, and I know I sound like a broken record but, check your ovens! I found that 25 minutes baked and a few minutes broiled worked perfectly for this recipe and really browned the meatballs nicely. It depends on your oven. My husband noted that next time a drip tray under the meatballs on broil would work and allow for the grease to drip out leaving the bottom of the meatballs drier.

Total Meal: We ended up putting the meatballs over whole wheat rigatoni and canned marinara sauce that we warmed up on the stove and added in fresh basil, minced garlic, a few drops of Tabasco, and some of the leftover chopped white onion.

This one is most certainly a keeper. Try it out and let me know what you think and don't forget to go over to "The Picky Palate" and look at some of her other delicious recipes (so far she is 2 for 2 on this blog and both were "Hall of Famers!".

Cleaned plate = Happy cook.

Wednesday, January 4, 2012

"Americanized" Shepherd's Pie

One of my favorite things to eat growing up was my mom's Shepherd's Pie. Not only was it delicious, but I felt entirely cooler eating something so European and not an American staple (ex: Shake n' Bake-we ate a whole lot of Shake n' Bake growing up too). I only learned how American my mom's Shepherd's Pie was (I mean it was a Weight Watchers recipe for crying out loud) when my friend's English mother said she was serving Shepherd's Pie for dinner and, when I looked down at my plate, I didn't recognize what I was eating.

The point is, original or "Americanized" Shepherd's Pie is a scrumptious, hearty, easy to whip up meal-in-one. I stumbled upon the recipe for this particular Shepherd's Pie when I was searching for Mini Ramekin recipes, an item I coveted and finally purchased with wedding gift cards and have felt guilty ever since for not using. Ironically enough, I discarded the Mini Ramekins all together when making this dish because it was easier to make in one large Ramekin or Deep Dish Pan. This recipe comes from "Life On the Flip-Flop", which is a blog run by three different women and contains a little bit of everything (it is sort of like the online version of "The View). Clicking on the blog title will bring you to the original link, but to be honest, I only slightly followed the recipe because I found it to be a bit confusing and full of unnecessary butter. Here's the recipe below with my edits:


My Large Ramekin Modified Shepherd's Pie

Their Mini Ramekins. Photo from: www.lifeontheflipflop.com

Mini Shepherd's Pie in Ramekins
(I just used a large Ramekin)

Ingredients :
8 tablespoons cooked ground beef
2 cups mashed potatoes
4 tablespoons corn
4 tablespoons butter
cheese or dairy free cheese

*I ended up using 1lb of beef because I wanted to use it up and it filled up the dish nicely. You would probably want to follow the ingredient amounts closer to a T if you actually used Mini Ramekins.

*Butter overload! I've done the recipe by the books and with my own twist only using the butter allotted in the instructions for the instant mashed potatoes and left out the rest. It tasted the same. So, if you'd like to do this the healthier way, X out the extra butter they tell you to add on top.

*I also added half a red onion, chopped, and two gloves of garlic, minced, that I added while browning the beef. I just love spice and flavor, so this was a welcomed addition to the dish.


Browning the meat with onion and garlic additions

Instant Mashed Potatoes. Tastes just as good with half the time.
Directions :
Place two tablespoons ground beef in bottom of ramekin. Top with butter and 1/2 tablespoon butter. Top this with 1/2 cup mashed potatoes. Spread 1/2 tablespoon butter over top and sprinkle with cheese or dairy free cheese. Bake at 375 degrees until cheese is melted. This is also good with bacon and green onions sprinkled on top!

*Instead of measuring it out per Ramekin, since I just used one large one, I piled it on in that order, leaving out the extra butter, and sprinkled Cheddar Cheese on top. I left out the bacon and green onions because A. I had none in the house and B. I was trying my best to make this as healthy as possible.

First the meat goes in


Then your corn

Dump in those mashed potatoes

Sprinkle on some cheese and pop that bad boy in the oven!

Pros: It tastes fantastic and is an easy home cooked meal that you can make in under a half hour. It is a great way to avoid take-out and have a nice family meal without having to slave over the stove for hours on end. It also tastes great heated up the next day for lunch (or breakfast if you are my very hungry nineteen-year-old brother).

Cons: The only issues I had was with the original recipe. It was confusing and a lot of the additions (like butter) were unnecessary. Once I made some simple revisions though, this has become one of my go to recipes.

Revisions: I stated them within the recipe, but here they are again. I used a large Ramekin instead of the Minis, I added half a red onion chopped and 2 cloves of garlic, minced, to the beef while browning. I also left out all the extra butter except what was called for in the instant mashed potatoes.

Ok, so it isn't quite the original, but like my mother's Weight Watchers Shepherd's Pie, my "Americanized" Shepherd's Pie is an easy, tasty dish that the whole family will love. Just don't forget the ketchup on the side! What is more American than that?!

Ta da! Told you ketchup is a must!

But maybe not that much ketchup...