Showing posts with label chicken. Show all posts

Friday, February 17, 2012

Easy Peasy Chicken Pot Pie with a Twist!

As a girl working, 9-5, what a way to make a living (yes I sometimes sing that to myself as I drive to work- I sound just like Dolly Parton in mind), I am always looking for the perfect dinner dish. That hard to find dish that is inexpensive, somewhat healthy, and most importantly, quickest to make. It is a continual fight to find a recipe that  I can rationally tell myself will take around the same amount of time as going through the takeout menus, picking up the phone, and ordering out.

This is my first week at my new job and I am bone tired, so cooking has been extra challenging this week. For some reason, I decided it would be a good idea to not only try out a new recipe on Pinterest claiming to be "super simple", but also from a blog I've never tried before. 

Luckily, the cards were in my favor and this recipe for "Super Simple Chicken Pot Pie" is from a "mommy" blog called "The Bizy Mommy" and it's about...well it's pretty self-explanatory. Instead of posting her recipe, I am just going to post my adaptations below because I ended up doing a lot of things differently based on what I had in the fridge, but you can always go to her site and check it out for yourself. The great thing about this recipe is that it's so flexible, you can easily put your own twist on it and it will come out tasting fabulous. Here's the recipe:

Yummm

Super Simple Chicken Pot Pie
adapted from "The Bizy Mommy" 
Serves: 6-8

Ingredients:

2 cups of chicken (I used two whole chicken breasts, chopped them up, and cooked them on the stove). You can use canned, or frozen, just cook per instructions)

1 bag of mixed frozen vegetables (nuke according to directions) 

1 can evaporated milk (skim or regular, doesn't matter)

1 packet of mashed potatoes (cook according to directions. She used a pre-made container of Bob Evans Mashed Potatoes just as an FYI)

2 cloves of garlic, minced

1/4 cup of onion, finely chopped (I used a sweet onion)

pinch of Parsley

pinch of garlic powder

salt and pepper (to taste) 

2 cans of biscuits 

Directions:

(Pre-Heat your oven at 350)

1. Whip up mashed potatoes, set aside. At the same time, prepare your chicken according to package directions.

2. Heat up your veggies (if you are using the frozen kind)

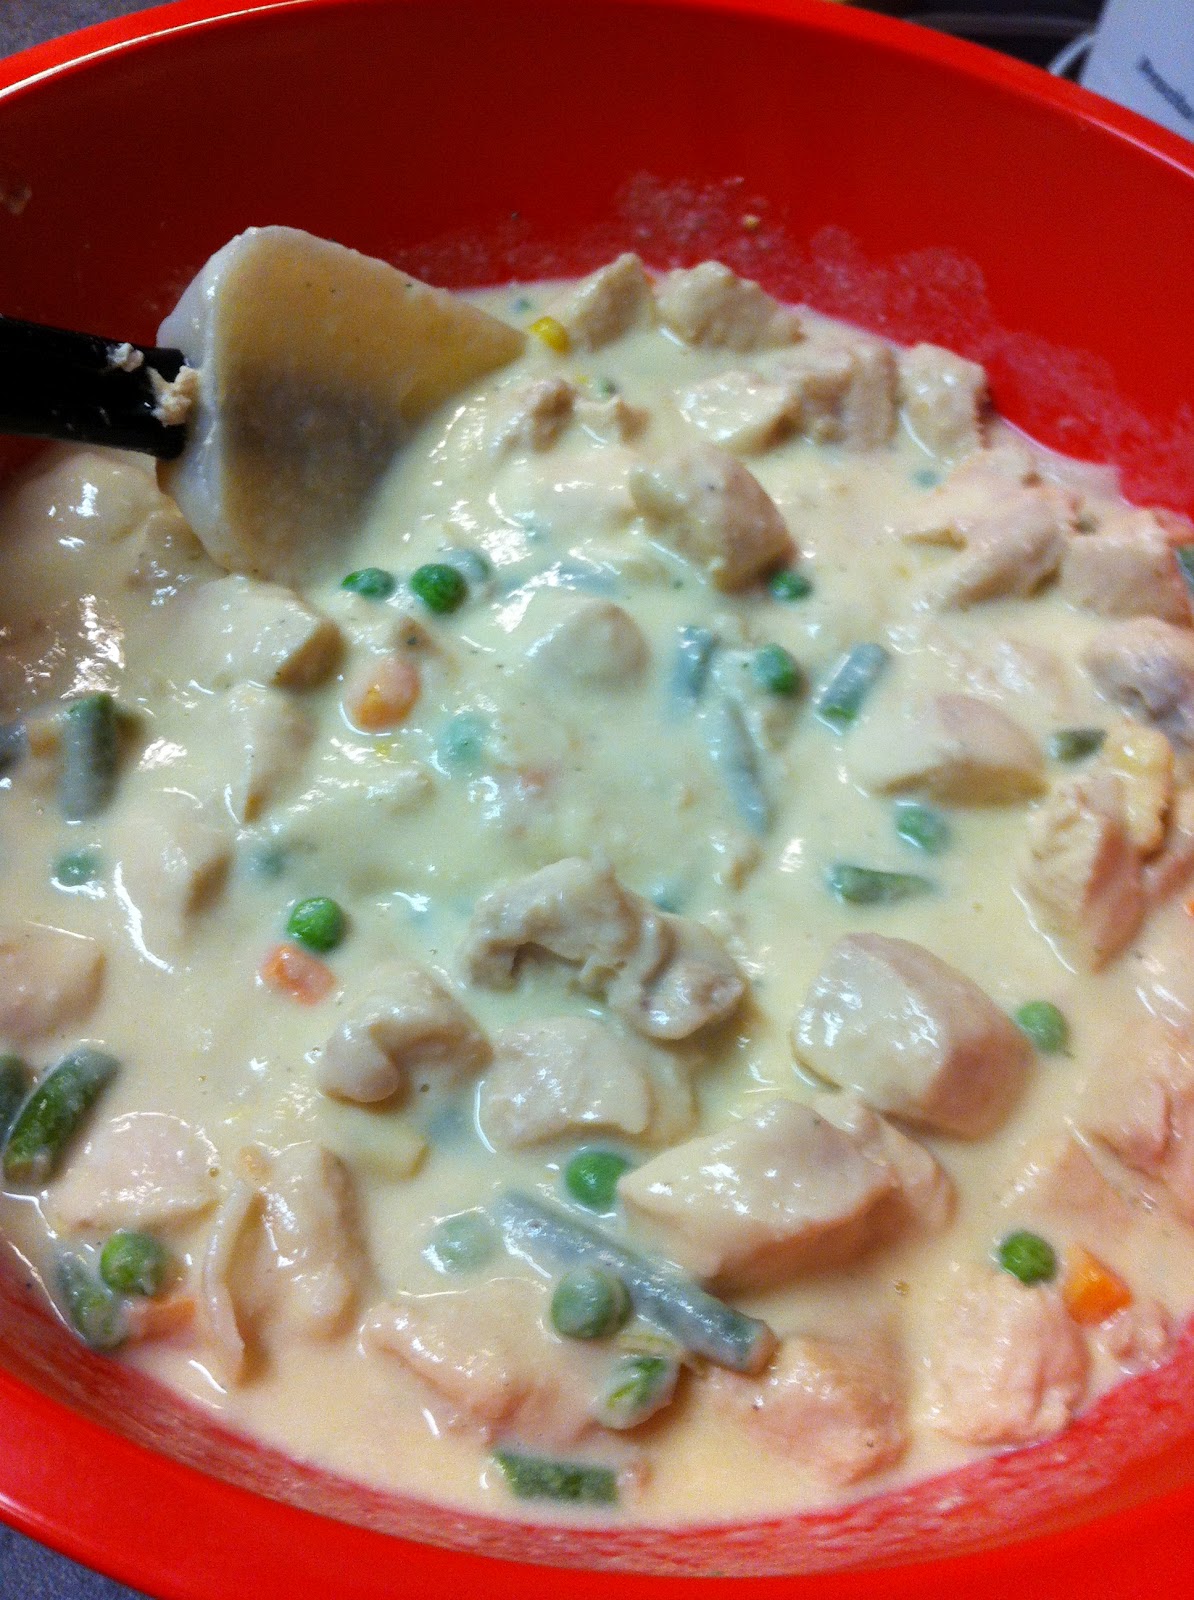
3. Dump everything (Except the biscuits) into a large bowl. Mix up.

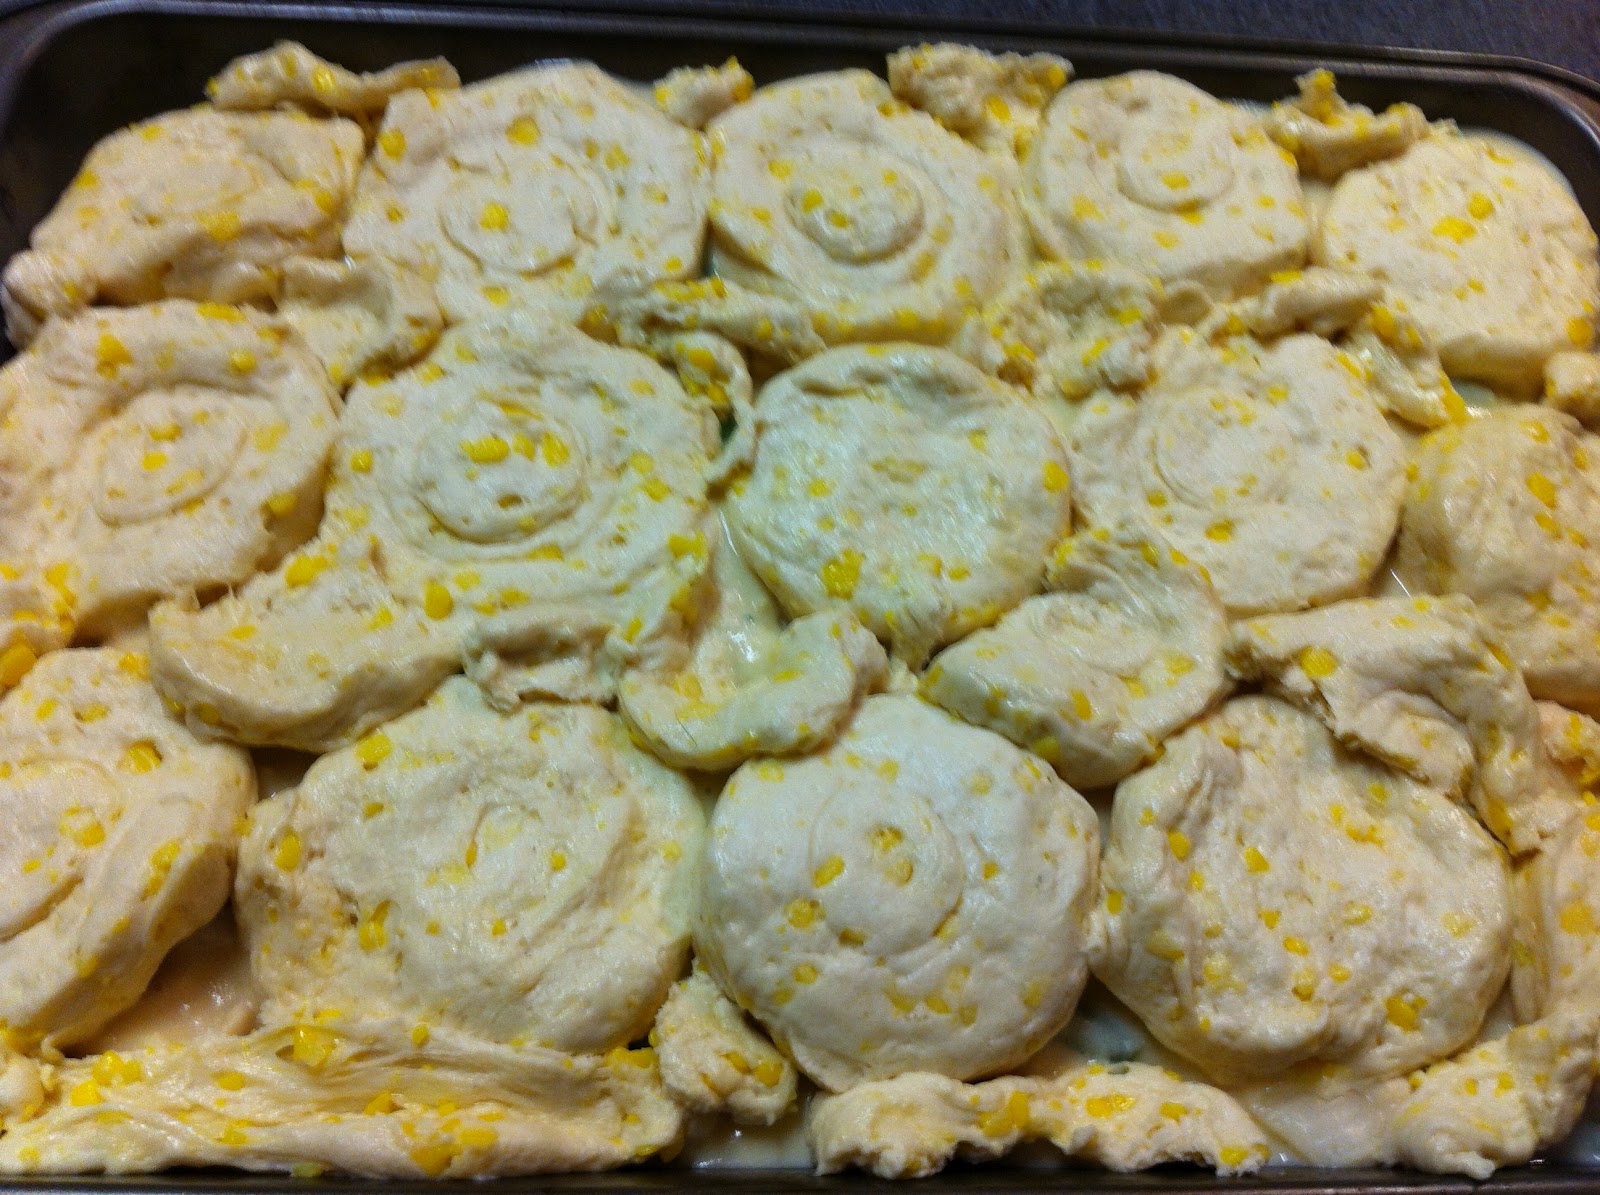
4. Pour into a baking pan (round or square) and cover with biscuits.

5. Pop in the oven at 350 for 20-30 minutes or until biscuits are golden brown on top. 

6. Devour

Ingredients sans chicken

Grilled chicken 

Mix it all up  
Poor into a pan 

Put the biscuits on top 

Fresh out of the oven! 

Pros: Despite the fact that I basically ended up changing half the recipe, it was not difficult at all. The best part about this recipe is there is little room for error. It's a "use what you have" kind of recipe. Most importantly it is AH-MAZING! The biscuits on top give it a twist and it is so much easier to make than slaving over a homemade pot pie crust. It is a twist that both my husband and brother gobbled up and then went back for more!

Chicken Pot Pie 


Cons: The big issue I had with her original recipe is that it called for pouring everything into a huge bowl and microwaving it for five minutes. Microwaved chicken breasts are going to turn out rubbery, so I was not inclined to follow that step. Based on that, I edited most of the recipe to fit my needs, but once again, that is the beauty of the recipe; it is very flexible. 

Revisions: Next time I would add more pepper and let it sit a few minutes before serving so it could firm up a bit, but other than that, it was absolutely delicious and a meal I will definitely make again...and again...and again...

Welcome to the Hall of Fame Super Simple Chicken Pot Pie! Your flaky, creamy, chock full of protein and veggies goodness is on its way to becoming a staple in my household. 

Wednesday, February 1, 2012

Easiest Crockpot Chicken Taco Ever...Seriously

In honor of the fact that this is the shortest recipe I have ever posted (it's already committed to memory), I am going to keep this post brief. Well that and the fact that I am bone tired from my full-time job. I do enjoy working, but man it interferes with my foodie pursuits (and subsequent blogging adventures). 


I discovered this recipe on Pinterest and it comes from a blog titled "My Chocolate Therapy", which I think we can agree is an odd title for a blog that includes dinner meals like Chicken Tacos. Anyway I decided to give it a try because, and I could have sworn my eyes deceived me, it involves only 3 ingredients and turns your Crockpot into the Head Chef of the evening. Here is the recipe:


Mine

Hers. Photo from www.mychocolatetherapy.blogspot.com


Crockpot Chicken Tacos
Recipe from Tasty Kitchen

1 envelope Taco Seasoning
6 pieces Boneless, Skinless Chicken Breasts
1 jar Salsa (16 oz)

Dump everything into a crock pot and give it a little stir to blend the seasoning with the salsa. Cook on high for 4 to 6 hours or on low for 6 to 8 hours. When done, the chicken should shred easily when stirred with a fork.

For tacos, serve the chicken with soft flour tortillas, lettuce, shredded cheese and sour cream. This is very versatile and can be used for enchiladas, nachos, tostadas, etc. Any leftover chicken can then be used for tortilla soup (make it the next day or freeze the chicken to use at a later time).


Throw it all in the pot and get cooking!


Pros: The recipe is simple, but more importantly, it is entirely accurate. Throw everything in the Crockpot, give it a stir, and in 6-8 hours on low you will get some shredded chicken goodness. My first thought when coming home from work was, "Wow this smells amazing. I hope it tastes as good as it smells." Oh it does. The chicken is so moist and packed with flavor. You really don't even need items like onion and salsa on the side. 


It was so good that the pup was begging for scraps!
Which, honestly, she does for any human food. 
Cons: I have zip. None. It was delicious. 


Revisions: The nice thing is that, you can really get creative and top your chicken with whatever you want. The chicken is so good that you could easily eat it on its own. If you wanted to be healthy you could also put the shredded chicken on a big leaf of Romaine lettuce and use that as your taco. I have read in the comment section of her blog that some people have added a can of  "Cream of Mushroom" soup to the mixture, but I didn't feel like it needed anything else. 


Check out that chicken!

I love taco night. 


This is definitely going to become a weeknight staple in our house. It is a great way to get some good home cooking without shelling out a lot of time or money. It is a great way to do Mexican and honestly, I do not think you can get chicken that moist any other way. So, give it a shot and let me know what you think! 

Saturday, January 28, 2012

Getting Hot Hot Hot!: Spiced Chipotle Honey Chicken with Sweet Potatoes

One of my fears with online recipes, and recipes in general, is that everyone has different tastes and different thresh holds of pain when it comes to a spicy dish. I'm always hesitant to try a hotter recipe because, how hot is it? It's sort of like the Goldilocks syndrome; will it be too hot, too cold, or just right?

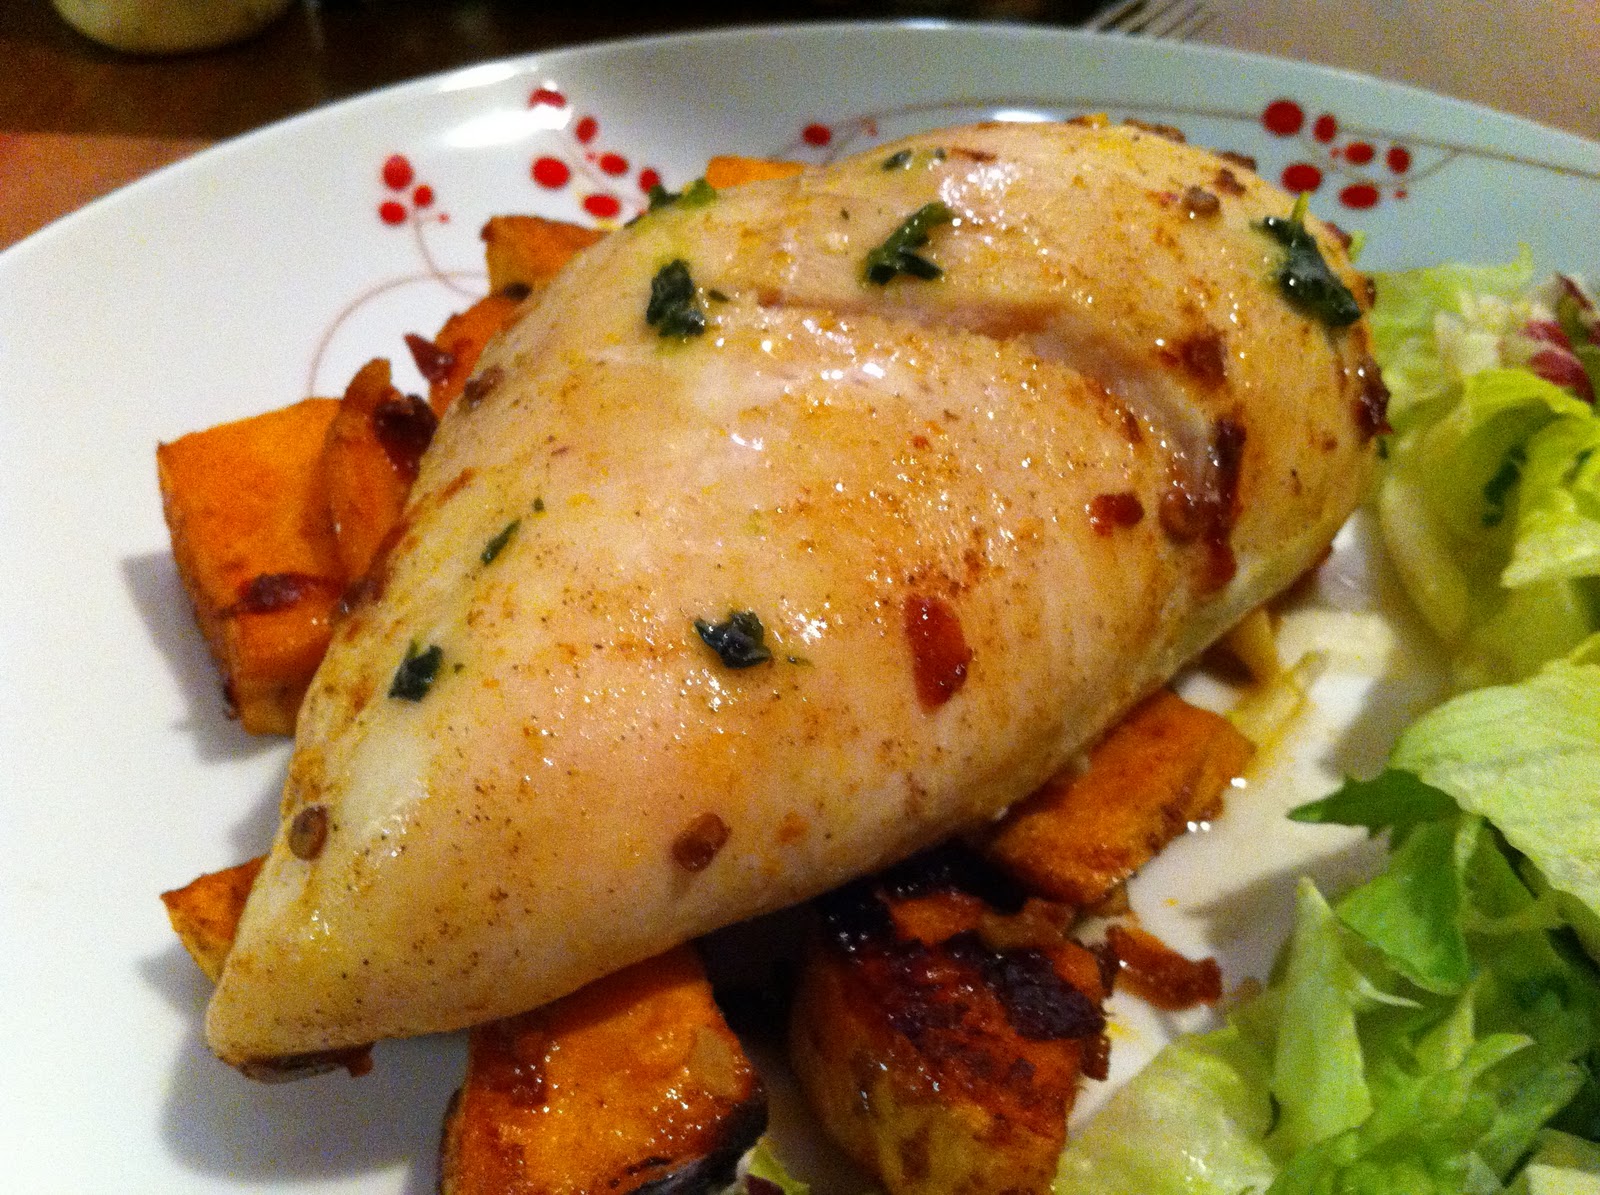
This recipe, Spiced Chipotle Honey Chicken with Sweet Potatoes, from "Pink Parsley" (a Pinterest finding) ended up being, too hot for me, too cold for my hot sauce junky husband, and just right for my medium heat chicken wing loving brother. It's surprising that it was too hot for me considering I usually eat spicier food than my brother, but at the same token, I think it was the sweet potatoes that packed the most heat, not the chicken, and my brother didn't eat the sweet potatoes (He informed me when we sat down to dinner that he does not eat sweet potatoes, a recent aversion as far as I know-I swear sometimes I think I'm living with a toddler). Here's the recipe:

Mine. 

Hers. www.pink-parsley.com


Spiced Chipotle Honey Chicken Breasts with Sweet Potatoes
adapted from
 In the Kitchen with a Good Appetite, by Melissa Clark
serves 6

(*Note: I halved the recipe)

  • 4 sweet potatoes (10 ounces each), peeled and cut into 1-inch pieces
  • 3 Tbs olive oil
  • 4 chipotle chiles in adobo sauce, minced
  • 3 garlic cloves, minced
  • 2 Tbs honey, plus more for drizzling
  • 1 Tbs apple cider vinegar
  • 1 1/4 tsp kosher salt, plus more to taste
  • 1 tsp ground cumin
  • 1/2 tsp ground cinnamon
  • 6 boneless, skinless chicken breasts (about 2 lbs)
  • chopped cilantro, for garnish (I used a squeeze bottle of cilantro. I find that when I buy herbs fresh I end up having to throw away half of the bunch because I never get around to using it all before it goes bad)
Preheat the oven to 400 degrees.  Place the sweet potatoes in a medium bowl.

In a small bowl, mix together 1 tablespoon of the olive oil, chipotles, garlic, honey, vinegar, salt, cumin, and cinnamon.  Mix the remaining 2 tablespoons of olive oil with 2 teaspoons of the paste.  Toss with the sweet potatoes. (*Note:  I have no clue what she meant by paste.  I'm not sure if she left something out or it's just unclear, but ignore this part and just throw in the rest of the olive oil at the end and stir).


That's about as paste-like mine got.

Scatter the potatoes on the bottom of a roasting pan, and bake 15 minutes.  Meanwhile, rub the chicken breasts with the remaining paste.  (*Note: By paste I interpreted it as the leftover mixture that I mixed the potatoes in). 

Stir the potatoes.  Carefully place the chicken on top of the sweet potatoes, and continue to roast until the chicken is just cooked through (registers 165 on an instant read thermometer), about 15-20 minutes longer

Divide the potatoes and chicken evenly among serving plates and drizzle with remaining honey and garnish with cilantro.  Serve.


My own personal litmus test for heat from my home (Figure out where you stand!)


My husband: The hotter the better. If it comes with a warning and you have to sign a release so that you don't sue the restaurant for your hospitalization for ingesting their nuclear sauce than he is game.


Me: I can do some heat, but I generally stick to mild salsa (or if it's medium only use a dabble of it) I also like some hot sauce and chipotle sauce (when it's mayo based). 


My brother: He is a wild card. He generally doesn't do a lot of heat (ie: he sticks to medium wings, not hot). This recipe was just fine for him although once again he didn't eat the sweet potatoes, which held most of the heat. 

Pros: If you can handle the heat than this is the dish for you. The flavors were good, the chicken was tender, and it was awesome that you could cook your side dish and main dish in one pan at the same time. Definitely makes for a pretty easy dish. Throw some veggies or a salad on the side, and you have yourself a full and balanced meal.


Cons: What the heck does she mean by "paste"? Where did this paste come from? I think that either she meant the actual mixture that you make for the sweet potatoes and chicken or she left something out. Either way that was unclear, which is no good when you are trying to follow a new recipe. 


Revisions: Like I said earlier, I think the sweet potatoes are what really carried the heat. If you don't like your dishes too spicy, I would go ahead and leave out the potatoes and just make a really small batch of the sauce for the chicken. I barely rubbed any sauce on the chicken so it was spicy enough without burning your esophagus. 


Overall this was a solid dish. Not a "Hall of Famer", but a dish that I would make again, but hold the sweet potatoes, please. 

Thursday, January 19, 2012

Pillsbury Does it Again: Easy Buffalo Chicken Stromboli

After last blog's super sandwich fail, I was feeling a bit burned by online recipes. Luckily, all it took was this recipe from Pillsbury to rekindle the fire and remind me why I love trying new dishes; it is the pursuit of the fantastic dish that keeps me going.


This is my second dish from Pillsbury, the first one being "Taco Melts", which was also delicious. The recipe is called "Easy Buffalo Chicken Stromboli" and while I usually don't like Buffalo Chicken and especially not blue cheese, I decided to give it a try. (I also ended up making edits to create something more to my liking, so make sure to read below the recipe for those). This dish was scrumptious. It was a plate licker of a dish. It was one of those dishes that even though it hadn't cooled completely, my husband and I gobbled up in panting bites in a vain attempt to cool it down while inhaling it simultaneously. It was well worth it. Here's the recipe:


Mine
Pillsbury's take. Photo from www.pillsbury.com


INGREDIENTS


2 cans (8 oz each) Pillsbury® refrigerated crescent dinner rolls
(*I used the store brand, it was a 2 for 1 deal)

1 package (9 oz) frozen cooked chicken strips (about 2 cups), thawed, cut into 1/2-inch pieces
(*I used chicken breasts, cut them up, and then cooked them)

¼ cup buffalo wing sauce

¾ cup shredded mozzarella cheese (3 oz)

¼ cup crumbled blue cheese (1 oz)

1 medium green or red bell pepper, cut into thin bite-size strips (or use strips of both colors)

¼ cup finely chopped red onion
 Blue cheese dressing, if desired
DIRECTIONS
1 Heat oven to 350°F. Spray large cookie sheet with cooking spray. Unroll both cans of dough into 2 large rectangles on cookie sheet. Place rectangles with long sides together, forming 15x10-inch rectangle; press edges and perforations to seal.

2 In medium bowl, mix chicken and buffalo wing sauce. Spoon chicken mixture lengthwise in 4-inch-wide strip down center of dough to within 1 inch of short sides. Top with mozzarella and blue cheeses, bell pepper and onion.

3 Bring long sides of dough up over filling, overlapping 1 inch; firmly press center seam and with fork, press ends to seal.

4 Bake 30 to 40 minutes or until deep golden brown. Immediately remove from cookie sheet. Cut crosswise into slices; serve warm with salad dressing.


Pros: I don't usually make stromboli, so it was a nice diversion from our normal menu and it was super easy to make. It is also a great recipe for picky eaters because there is a lot of potential for variations. Don't like hot sauce? Don't use it. Use chicken instead of beef. Make it vegetarian. Lose the blue cheese. The possibilities are endless.Cons: I think if we had followed the recipe in to a T terms of assembling it (we didn't have a large enough cookie sheet to begin with) that it would have been really hard to construct. Revisions: Starting from the beginning. We didn't have frozen chicken so we used 3 chicken breasts that we had in the fridge, cut them up, and cooked them on the stove top. Then we put them in the fridge for a couple of minutes to cool them off. The important change: Since we did not have a big enough cookie sheet we used a can each to make two separate stromboli's. The first one we made with all the ingredients and folded the pastry up as noted. It was not an easy task and the pastry barely covered the mixture. For the second one we halved the pastry and put one half down as the bottom, then put on the ingredients sans blue cheese (I don't like blue cheese, I added more mozzarella instead), and then placed the other half of the pastry shell on top and folded it up. It was a lot easier to make and created the same final product.This is without a doubt a hall of fame recipe. It may not be the most amazing thing you'll ever eat, but it's pretty darn tasty and it is easy to make, which with a new full-time job, is something I value right up there with the quality of the dish. So, give it a try and let me know what twists you put on the dish!  *Serve with blue cheese dressing or ranch dressing (I'm sure you know which one I used!)

Saturday, January 7, 2012

Balsamic Bruschetta Chicken: First Hall of Fame Dinner Recipe!

This is my first recipe from "Budget Bytes" and I am shocked that it took me this long to blog about it. I am obsessed with Beth M, the creator of this magical site. I really am her #1 Foodie Fan. Her easy to follow, unique, delicious, and inexpensive recipes have totally upped the ante when it comes to my cooking. I have tried a bunch of her recipes and have only had one that was only "ok", the rest were fantastic. She also incorporates a lot of ingredients that you already have in the house so you are not running out to by 20 different items you'll never use again. Her blog is accessible and easy enough for beginner cooks while still providing tasty challenges for advanced cooks.

When I found out my grandparents were stopping in my neck of the woods on their way to the 6th borough of New York (aka the East Coast of Florida) for their winter hibernation, I knew I had to 1. show off my new found cooking prowess and 2. Cook something from Budget Bytes.
Hers. She makes a pretty presentation. Photo from Budgetbytes.blogspot.com


Mine

I decided on the Balsamic Bruschetta Chicken because it is savory, full of flavor, and basic enough that most everyone will enjoy the meal. The best part about it is that you can get the marinade out of the way in the morning and finish up the recipe in the evening, so it's definitely good for men and women with hectic schedules.

The recipe is below, but if you want to see the break down of price per ingredient, check out the full blog post here:

Balsamic Bruschetta Chicken
(recipe from Budget Bytes, photos are from personal stock)

Total Recipe cost: $6.75
Servings Per Recipe: 4
Cost per serving: $1.69
Prep time: 20 min. Cook time: 15 min. Total: 35 min.
Ingredients: 2 Lg chicken breasts, 1/4 C Balsamic Vinegar, 1/2 TBSP Olive Oil, 1/4 TSP minced garlic, a pinch of salt and pepper.

Bruschetta Topping: 4 medium Roma tomatos, 1/2 medium Vidalia (sweet) onion, 1 TSP minced garlic, 2 TBSP Balsamic Vinegar, 1 TBSP Olive Oil, salt and pepper to taste, 1 C of shredded mozzarella.

STEP 1: Trim the excess fat from the chicken breasts and cut each piece into two. Cover the chicken with plastic wrap and pound the pieces down to one inch in thickness (use a rolling pin or heavy pan to pound).

Individual chicken breasts and lots of 'em!

STEP 2: Place the chicken pieces in a container or zip top bag along with 1/4 cup balsamic vinegar, 1/2 Tbsp olive oil, 1/4 tsp minced garlic (or one clove if using fresh), and a healthy pinch of salt and pepper. Mix everything around to make sure the chicken is coated in the marinade. Refrigerate until ready to cook.


Soaking up the marinade
STEP 3: Prepare the bruschetta topping. Finely dice the onion and tomatoes. Combine them in a bowl with the minced garlic, balsamic vinegar, and olive oil. Stir well, taste, and add salt and pepper to your liking (I like generous salt in this mix, about 1/2 tsp).


Topping (I tripled the recipe)

STEP 4: Grill the chicken until cooked through (I used my countertop grill, it only took 5 minutes). Turn the oven on to broil and adjust the rack so that is about 6 inches below the heating element.

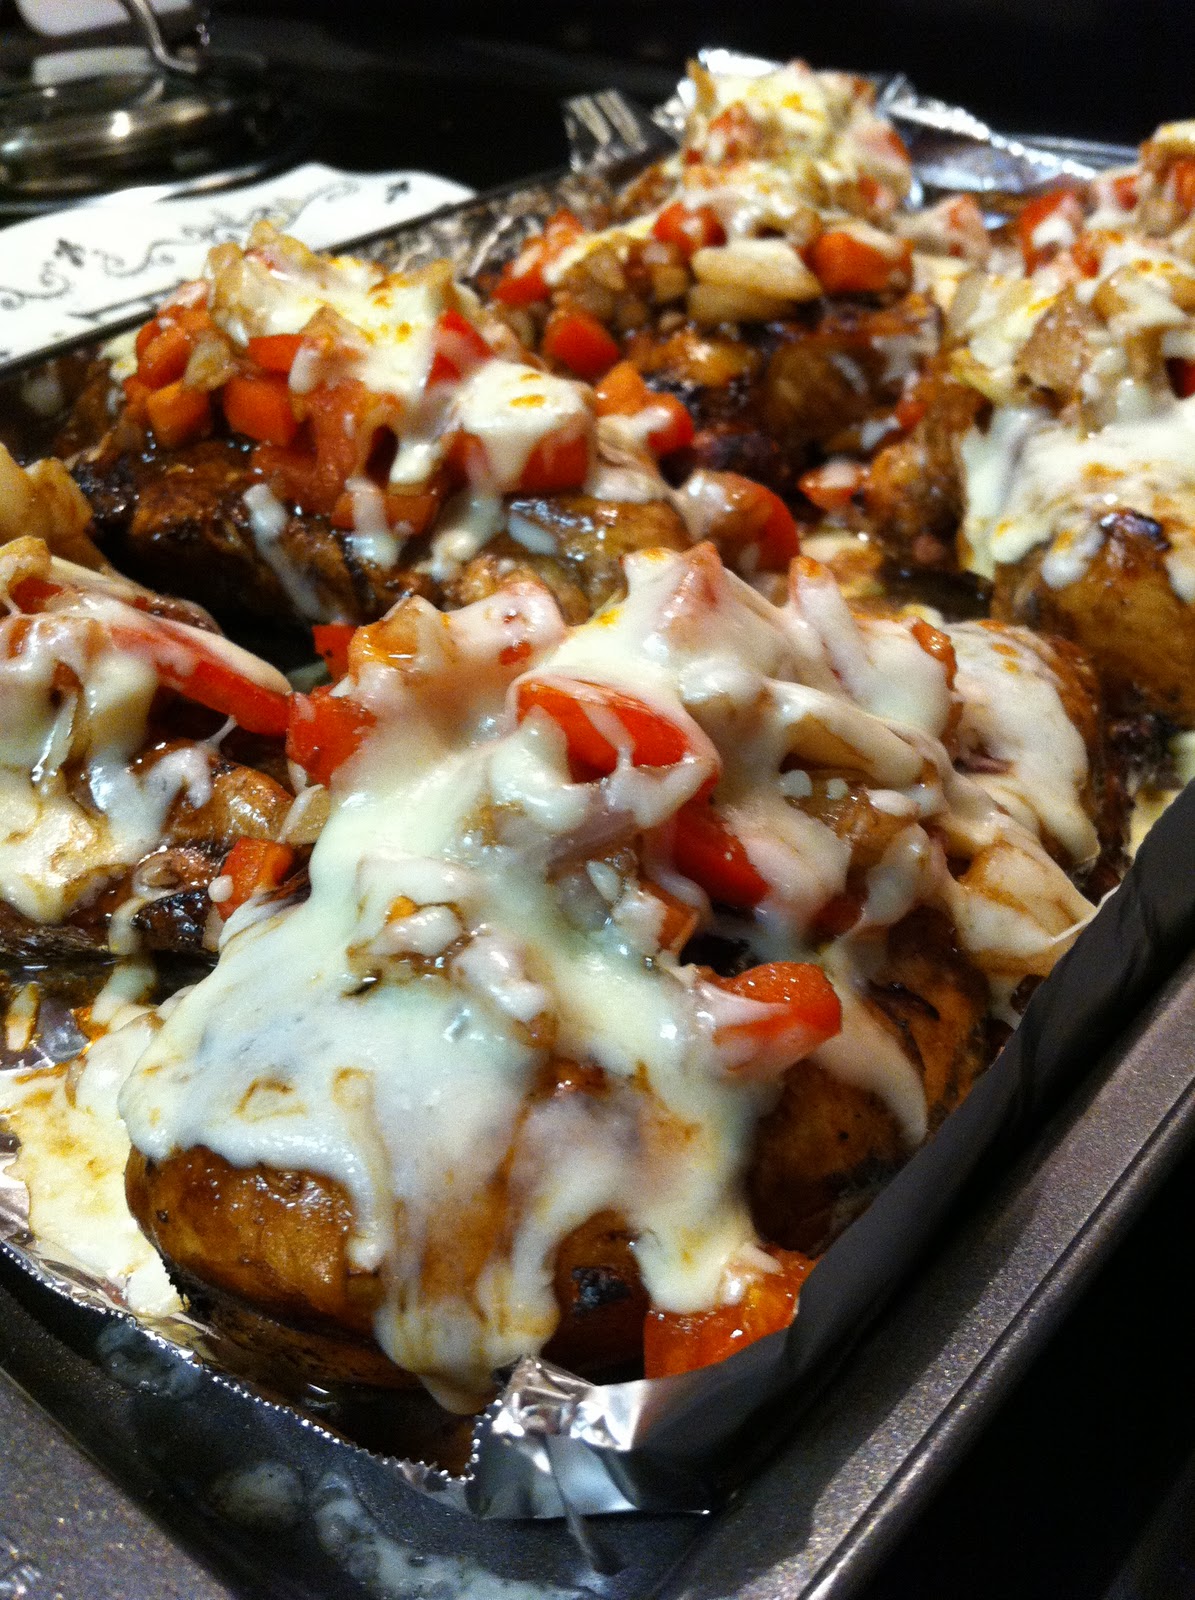
STEP 5: Place the grilled chicken pieces on a baking sheet covered with foil. Top each piece of chicken with about 1/4 cup of the tomato bruschetta topping and about 1/4 cup of shredded cheese. It's okay if some falls off, you can scoop it onto your plate along with the chicken. Place the baking sheet in the oven under the broiler. Cook just until the cheese is fully melted (5-10 minutes). Serve hot!

Pre Oven


Out of the broiler. Check out that cheese!

Pros: YUM YUM YUM! This recipe is so fresh and the flavors balance each other out perfectly. Also, the recipe is super easy to follow along with.

Cons: Can't think of anything really.

Revisions: Instead of getting 2LG chicken breasts, we just got individual chicken breasts, pounded them out a bit, and after the marinade, put them on a charcoal grill. (I'm a big believer everything tastes better on a real grill, but you could do it either way). Also, keep an eye on your broiler! The first time I made this, I didn't check on my chicken till 5 minutes in and the cheese had already started to burn. This time under my more careful eye, it only took 2-3 minutes until the cheese on top was gooey and melted and ready to come out.

I know this is redundant, but I really love Budget Bytes. I just think it is one of those food blogs, out of so many unnecessary food blogs out there (possibly this one included?) that really satisfies a need that many people have; to find an inexpensive, healthy way to cook. And not only that, but a way to cook that is satisfying and tastes good.

Needless to say, this was a Hall of Fame recipient. It got the seal of approval from my grandparent's and the cleaned plates were the greatest compliment for this beginner chef.


They like it, they really like it!

Monday, January 2, 2012

Do Not Fear the Crock Pot

The Crock Pot. A genus invention that lets machine do the hard work and leaves your home smelling that a fine restaurant (if you've followed the recipe right). Yet it's funny how such a simple machine leaves so many baffled. And I'm not judging; I've been right there with the rest of them. No one likes a failed meal let alone one that you cook for an entire day just to feed to the trash. Also, there seems to be an extreme of recipes out there; they are either soups and stews or really intricate meals included in the "Slow Cooker Manual" that comes with most Crock Pots (I honestly can't look at mine without feeling a total aversion to my Crock Pot. Too many steps, too many ingredients, too much room for failure). And as far as soups and stews go, there are only so many you can make before going stir crazy. Also, as a Floridan, there are not many days that require a hearty stew to keep you warm, that's what we have the proximity to the Equator for.

I didn't realize my potential for sharing my Crock Pot wealth until my high school friend, Esther, Facebooked me with this request: merecon I need some non-stew, non-gross, healthy crock pot dinner recipes..mind doing the work for me of finding some good ones? :). Obviously she fed right into my weakness for online recipe hunting, hence this blog, smart gal. Also, on a side note, she is an amazing writer. Check out her blog "Lovingly Thrown Together" when you have a chance. It has a little bit of everything, the photography is fantastic, she'll make you laugh, cry, but most of all you relate to her. I like to think of it as my blog's cooler, more polished, friend's older sister that sometimes lets us hang out in her room and use her makeup.

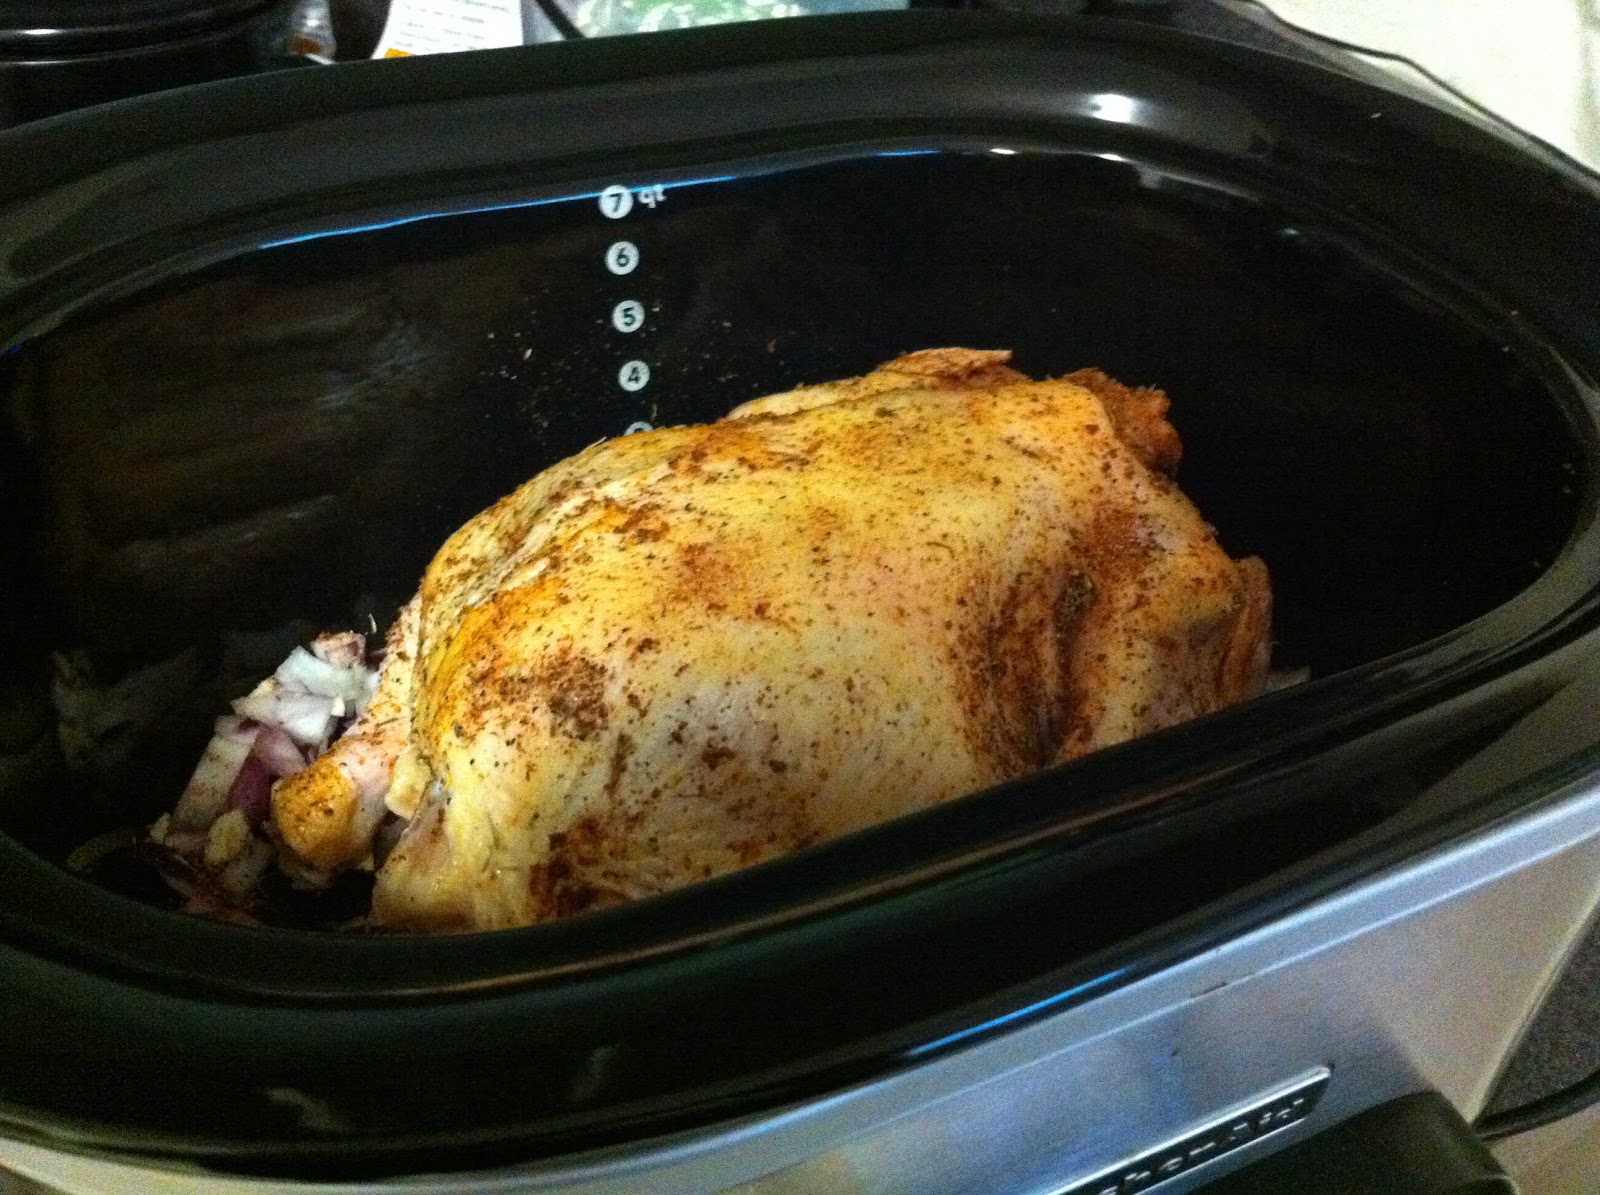
Anyway back to food. For my first ever Crock Pot blog I am choosing something super simple, Crock Pot 101 if you may: Whole Chicken Crock Pot. Simple and to the point. It comes from Food.com, which has a lot of tried and true recipes uploaded by fellow chef's and chefs-to-be.


Whole Chicken Crock Pot. Photo from Food.com

Ingredients

Servings: 4

Units: US | Metric

Mix, rub, and set in the Crock Pot. Easy as that!

Directions:
In a small bowl, combine the spices.
Remove any giblets from chicken and clean chicken.
*(This turned into my own personal "I Love Lucy" moment. I've never cleaned a chicken before and after whining to my husband to do it for me, I was forced to attack the beast myself. Within the first minute of cleaning I had broken off the foot. Thank the Lord I don't have a newborn.)
Rub spice mixture onto the chicken.
Place in resealable plastic bag and refrigerate overnight. (I usually skip this step because I'm always in a hurry).
*(Whoops-missed that step! I just slapped on the marinade and cooked that sucker.)
When ready to cook, put chopped onion in bottom of crock pot.
Add chicken. No liquid is needed, the chicken will make it's own juices.
Cook on low 4-8 hours.
Note: I highly recommend a pop-up timer in the chicken because some crock pots cook faster/slower than others (my crock pot cooks this recipe in 4-5 hours).
*My Note: Mine took nearly 8 hours on low. It is really important the first time you cook a recipe to check on your meal every few hours to make sure it is not overcooking. Your Crock Pot is like a new boyfriend or girlfriend, you need to wine and dine it, ask questions about it, get to know its temperament until you instinctively know how long certain recipes will take to cook in it.
Pros: It was fall off the bone, amazingly flavorful chicken! I threw some garlicky carrots and biscuits on the side and we had ourselves a darn good meal, besides ruining the nerve endings in my thumb (see bottom of blog for details).
Cons: None. Besides the whole washing chicken bit.
Revisions: I think I would try marinading it overnight next time.

Also I have no after photos because I ended up  badly burning my thumb on a baking sheet trying to remove biscuits. For some reason I temporarily forgot that my hand does not have a built in oven mitt.

Baking warrior

But really, the chicken got it so much worse, at least I still have my appendage...