Wednesday, January 18, 2012

When Bad Guacamole Happens to Good People

In my never ending quest to find quick and easy recipes during the work week, I thought to myself, "What could be simpler than finding a great sandwich and pairing that with soup or a hearty salad?" Famous last words.

After what felt like hours of chopping, mincing, food processor-ing (?) and a disaster of a kitchen, I was left with an inedible, funky, ridiculously overpowering onion tasting guacamole grilled cheese sandwich. Luckily for me I always have spare Eggo's on hand, so breakfast for dinner it was last night.

This recipe comes from "Two Peas & Their Pod", a husband and wife blog sharing their culinary creations with the world. I found the actual recipe for the "Guacamole Grilled Cheese Sandwich" on Pinterest and in the time it took to toast my waffle, an arduous task, I think I figured out what went wrong and who the culprit was, caught green handed. Here is the recipe:

Theirs. Everything looks better in rack focus. Photo from www.twopeasandtheirpod.com

Mine cooking away. 


Guacamole Grilled Cheese Sandwich


Yield: 2 sandwiches
Prep Time: 5 minutes
Cook Time: 5-7 minutes
The guacamole takes this grilled cheese sandwich to a whole new level of goodness.

ingredients:

To make the guacamole:
2 ripe avocados
1/2 small onion, minced  (WARNING: This is where the recipe went wrong. Too. Much. Onion)
1 clove garlic, minced
1 small jalapeño, stems and seeds removed, minced
2 tablespoons cilantro leaves, finely chopped
1 tablespoon of fresh lime juice
1/2 teaspoon coarse salt
A dash of freshly grated black pepper
1 Roma tomato, chopped
4 slices crusty white bread
4 slices Cheddar cheese
Butter, for buttering bread

directions:

1. To make the guacamole-cut avocados in half. Remove seed. Scoop out avocado from the peel, put in a large bowl. Using a fork, mash the avocado. Add the onion, garlic, jalapeño, cilantro, lime juice, salt and pepper. Stir until well combined. Add the chopped tomato and stir.
This recipe is so frustrating! Luckily I had my
brother to do the mashing of the avocado for me. 
2. Heat a pan or griddle to medium-high heat. Spread desired amount of guacamole on both slices of bread then top with cheese. Butter outer slices of bread and grill on one side for about 2 minutes or until golden and crispy. Flip the sandwich and grill until golden brown. Make the other sandwich the same way and serve warm.

Uhhh I can taste the onion through this picture. 
Pros: From a comical standpoint, it was hysterical to watch my husband and brother's reaction to the sandwiches as they both took huge bites, masticated for a second or two, and proceeded to spit it back out. The sandwiches quickly turned into a game of who would try the biggest bite and who was brave enough to try and peel off the bread and cheese portion of the sandwich without touching the guacamole.
Cons: Let's start from the top. For starters, 5 minutes of prep time? You have got to be kidding me. It was more like 45 minutes of prep time. I'd like to meet the person who can single handily chop, peel, dice, remove seeds, and mince all of those ingredients in 5 minutes. 
My next issue was the guacamole. Had I reviewed the recipe more in depth, I think I would have foregone their guacamole and just made the kind I like instead. My favorite has to be "Mock-a-mole" by Bethanny Frankel. Not only is it delicious, but it's a lot better for you than regular guacamole (less avocado). Their guacamole recipe really isn't anything out of this world and the onion was way too overpowering. You literally couldn't taste anything but onion. Honestly, I could have eaten a raw onion and had the same effect (and it would have taken less time to make). Granted I did double the recipe, so I will take the blame for some amount of human error, but I think even made exactly as stated, the onion would have still overpowered the sandwich. I think that they would have been better off measuring out the onion and letting the reader know exact measurements of how much onion they used because I doubt it was supposed to taste like pure rancid onion.
Revisions: This isn't a complex, mind boggling, recipe, the idea is good it just doesn't pan out well in practice. I would try this recipe again, but probably make the guacamole I already know is fantastic and then follow the recipe from there.  In fact, I really wouldn't need the recipe at all after that point, it's just guacamole and cheese on bread. So, I have to give "Two Peas and Their Pod" credit for a good idea and a fresh new way to do Grilled Cheese, but this is not a recipe I will venture to try again. 
It goes without saying this is a "Hall of Shame" recipient. 

Monday, January 16, 2012

Me Gusta Taco Melts!

Know what's super pathetic? I had to go to free translation to make sure that I spelled "Me gusta" or "I like" correctly before posting this blog. Clearly that four years of Spanish in school served me well.


But, this recipe really is "muy bueno" and best of all incredibly simple to make. Ever since I started my grown up real world job (all of ten hours ago) I have been scouring the Internet for easy to make, weeknight meals that are tasty and do not break the bank. I tested this one out over the weekend and it comes from Pillsbury and is called Grands! Easy Taco Melts. This is my first recipe from the major supplier of all things doughy and I have to admit, I was a bit skeptical at first. I hate recipes that push products (obviously they are going to push their name brand of "Grands", but does it really make a difference if I use Old El Paso Thick n' Chunky Salsa? I think not. Also, I just thought it was going to plain suck, sort of like making the equivalent to a fast food dinner. I was proven wrong, deliciously incorrect, on both counts. Here is the easy recipe:

The Dough Boys. Photo from www.pillsbury.com
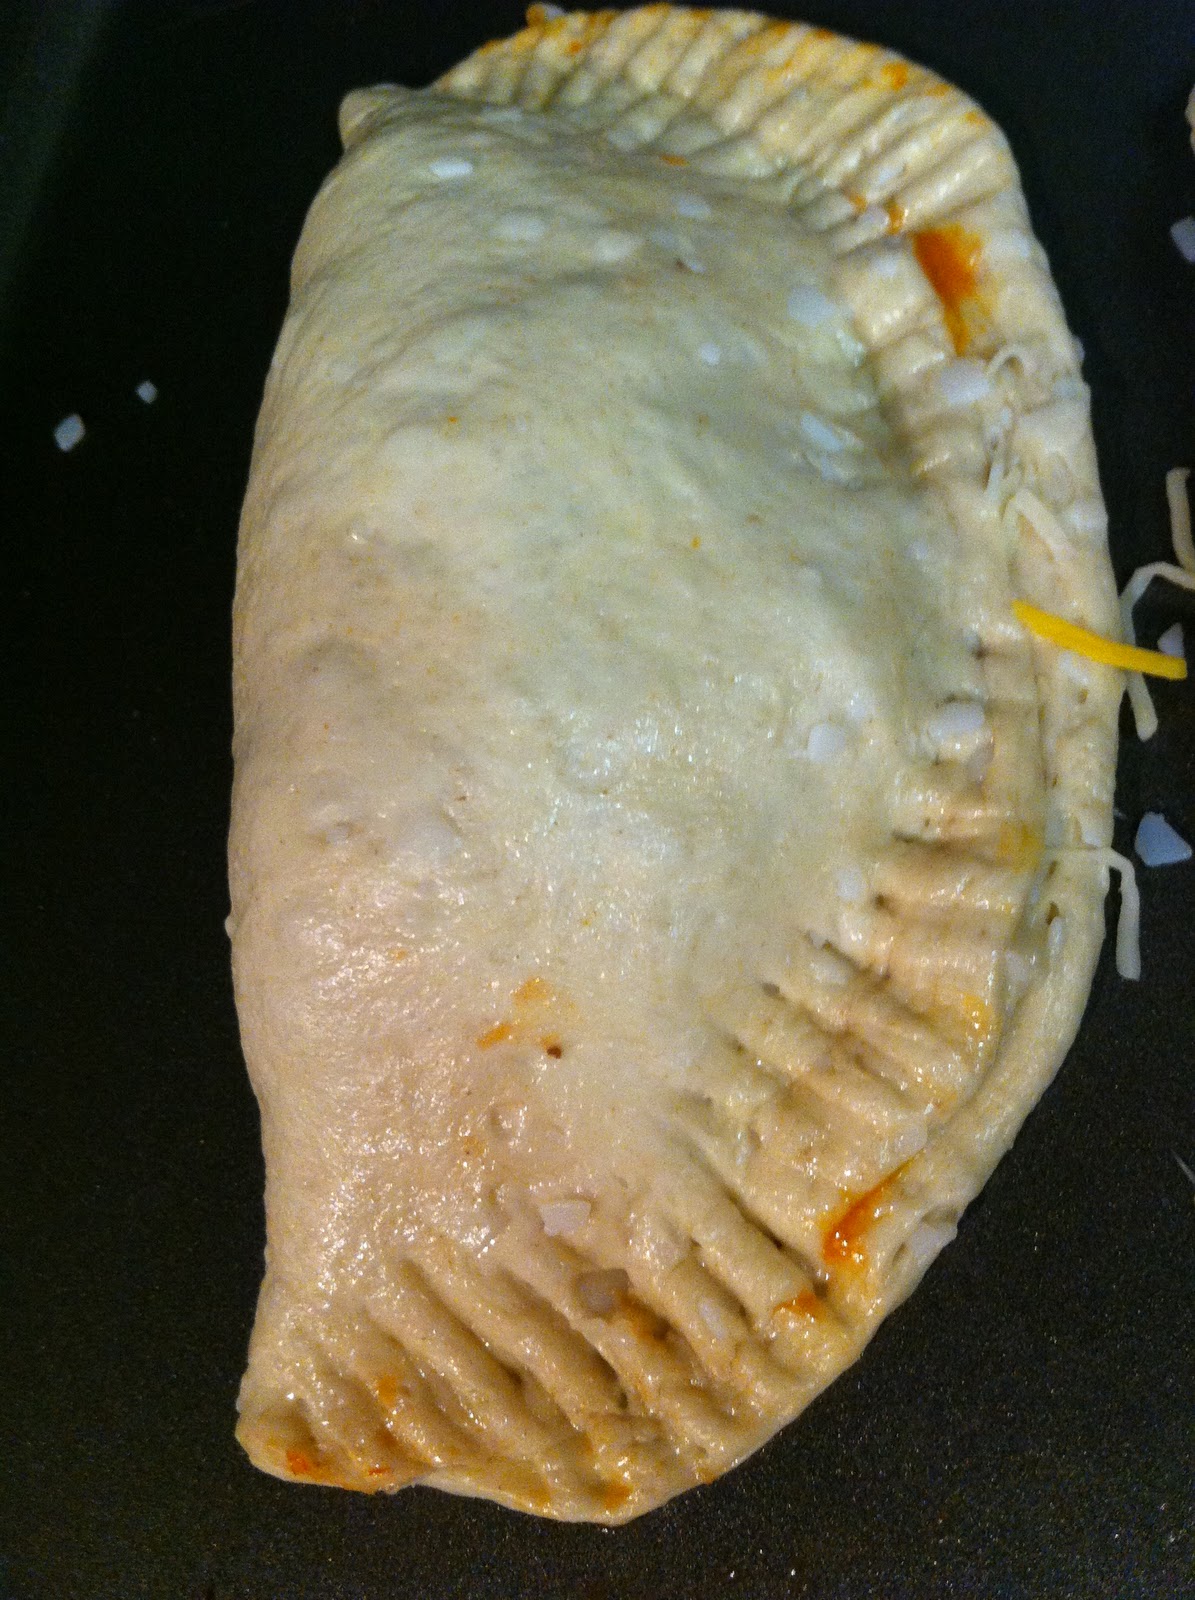
Mine
Grands! Easy Taco Melts
Makes 8-10 Melts

INGREDIENTS
1 lb lean (at least 80%) ground beef, cooked, drained
1 1/2 cups Old El Paso® Thick ‘n Chunky salsa
1  can (16.3 oz) Pillsbury® Grands!® refrigerated biscuits
1/2 cup shredded Monterey Jack cheese or Mexican cheese blend (2 oz)

DIRECTIONS

1. In 10-inch nonstick skillet, mix cooked beef and 1/2 cup of the salsa. Cook over medium-high heat, stirring occasionally, until hot.


Brown the meat. Add the salsa. Easy Peasy!

2. Press each biscuit into 6-inch round. Spoon 1/3 cup meat mixture and 1 tablespoon cheese onto center of each round. Fold dough in half over filling; press to seal. Place on greased cookie sheet.


Use a fork to press down the sides. 
3. Bake at 375°F 9 to 14 minutes or until golden brown.


Ole!
Pros: It's yummy, it requires four ingredients (well five if you count sour cream as an essential ingredient, we do in my family), and it is filling! One was plenty for me with a salad on the side and two more than filled up the men of the house.

Cons: This was really just a "Meredith is a spazz" negative, but I was pretty dismal at assembling the melts. You definitely have to make sure to flatten the dough out to the point where it is almost ripping to fit the meat mixture and fold without oozing out the meat mixture (wow that was a gross way to describe food. Sorry!)

Revisions: On principle I did not use the brand name salsa (really the supermarket brand was cheaper and a 2 for 1, I love a good deal). Also, on the side I made a salad with tomatoes and chopped red onion to compliment the melt, but next time I think I would add the chopped onion right into the melt, it would have added a nice flavor component to the dish. Even without it, it was still a hit in my house.

This is the perfect recipe for the busy man or woman (and really who isn't?) who is looking to try a new recipe that is attainable on a weeknight. It is a different take on "Mexican" night that is simple yet packs a lot of punch. Also, it holds nicely to make a great taco salad for next day's lunch, and any dish that you can get more than one meal out of is a good thing in my book! 


Sunday, January 15, 2012

First Hall of Shame Dessert...Le Sigh

It was inevitable. Eventually a dessert was going to have to bomb, I just really wish it didn't happen when my grandparents were in town. This dessert disaster, a Chocolate Truffle S'mores Tart, comes from "Lauren's Latest", which is a blog that I really do love, so I was surprised that this recipe was such a mess. I've featured a recipe from her before on this blog, her Mini-Mint Truffle Brownie Bites were scrumptious, but oddly enough while the downside of that recipe was that the brownies stuck to the muffin liners, the main problem with this recipe was that I couldn't get the crust to stick together. And if your foundation isn't stable, the whole cookie (or in this case tart) crumbles.

Let me say, in her defense, it wasn't quite a straight forward fail, it tasted great, but it just wasn't worth the time and energy spent making this dessert. I could have easily slapped a piece of chocolate, marshmallows, and graham crackers together, nuked them up, and thrown them in a bowl with some vanilla ice cream and I would have gotten a similar result. As you will soon see, my final product did not resemble a tart of any kind, more of a heaping mess of chocolate, marshmallow and sugar (which really, if you're going to have a mess, it might as well be of the tasty sort). Also, a majority of it ended up on my floor, which led to me continuously cleaning from the mess the flipping unstable graham cracker crust created. Here is the recipe, so that maybe we can figure out what went wrong:


Hers. Now doesn't that just look delightful!? Photo from http://www.laurenslatest.com/


Mine. Oh wow it looks nothing like the photo!


Chocolate Truffle S’more Tarts
yield: 4 tarts, 4-6 servings

(*I actually made it in one 10 in tart pan, which I asked the author about, and she said it was just fine to make it that way. Really it should make no difference, just wanted to point out that change).

Ingredients:
for the crust-
1 sleeve graham crackers, finely ground
4 tablespoons butter
2 tablespoons granulated sugar

for the filling-
1 1/2 tablespoons sugar
3/4 cup heavy cream
pinch of salt
2 egg yolks
2/3 cup semi sweet chocolate chips
1/4 teaspoon vanilla extract
2 cups mini marshmallows

Directions:
In a small bowl, mix all ingredients for the crust until completely moistened. Divide evenly between 4 individual tart pans and press in. Place into the freezer while you make the filling.


Crust mixture.


Crust pre freezer. Didn't look sturdy enough even here, but I thought the freezer
work work some magic. It didn't.


For the filling, stir sugar and salt into cream in the top of a double boiler. {A heat-proof bowl over lightly simmering water works just fine!} (*No it really doesn't)

My super fab, homemade double broiler.

Stir occasionally to heat cream thoroughly and dissolve sugar, about 7 minutes or so. (*And by or so, in my case, it was some insane numerical amount like 15-20 minutes).

Temper egg yolks with hot cream and mix. Pour that mixture into the double boiler and stir frequently for 10-12 minutes so the mixture can thicken. Remove from heat and stir in chocolate chips and vanilla extract. Stir until chocolate has melted and filling is a smooth and uniform consistency. Pour into tart shells evenly and sit out at room temperature. {Because the shells were in the freezer, this should take 30 minutes or so.} Place plastic wrap directly onto the filling of the tarts and refrigerate at least 2 hours or until the filling has set. {You should be able to remove the plastic wrap cleanly–with no filling on it.} Store in refrigerator until ready to serve.

Right before going in the fridge. At this point I knew I was doomed
to fail.

When ready to serve, remove tarts from fridge. Top with 1/2 cup mini marshmallows each and torch the top to toast. {Or stick them under a hot broiler for a few seconds.} Serve immediately.


Torching by candle light. haha


The last time this dessert would remain in tart form.
30 seconds later the first cut caused it to crumble.


After its makeover. More of a ice cream tart mush.


Pros: As I said before, it really is a tasty little treat. The flavors are all there, it just didn't stay in tart form as promised.

Cons: I am going to break this up into three points: the dessert itself, the recipe, and the tools required.

The Dessert Itself: The crust did not stick together at ALL. It was a crumbly hot mess. Also, as I said before, while it was delicious, so is anything including chocolate, sugar, and marshmallow with a side of vanilla ice cream. I just could have done it in 30 seconds and saved my floor from continuous scrubbing.


The Recipe: I am the kind of person that needs to be spoken to like a toddler when following a recipe. How heated do you want the cream and sugar mixture? Like burn my finger hot or this would make a nice bath hot? How slow should I pour the mixture onto the eggs? What the heck does temper mean?! And how tempered would you like these eggs? I don't want to Wikipedia while trying to follow a recipe. I think it's best to assume when posting a recipe that a majority of your readers were not in the "Gifted and Talented" program and therefore could use a very thorough breakdown of the recipe, even if it seems obvious to the writer. Remember, we can't all be Martha Stewart. Some of us aren't even close.


The Tools Needed: I do not have a double broiler and I have done recipes before where I have made my own jenky broiler and in other cases it has worked out just fine, not so much in this case. I don't think the breakdown of minutes or how hot you are supposed to get the broiler worked if you were making your own with a sauce pan and a heat proof bowl. I had to continually turn the heat up and down to try and mimic what she was able to do with a real broiler. It just didn't work and took twice the time.

Revisions: I think the crust was lacking more ingredients that would help it stick together. Potentially more butter or milk, something like that, would have helped the graham cracker mold into a more stable tart crust. I truly believe that had the crust held up and if I had a real broiler, this recipe could have been a success.

While I love "Lauren's Latest", this was a definite Hall of Shame recipe for me. The taste was there, but if it takes twice the time to make and doesn't even end up resembling the recipe it was based on, than it's not worth it in my book. If I am going to spend time and energy on a recipe, I want it to be spectacular; I want the end to justify the means. This just didn't do it for me.

Saturday, January 14, 2012

I Makea Da Meataballs!: Mozzarella Stuffed Homemade Meatballs

Ok I know I am being very nonchalant about my distribution of "Hall of Fame" awards, but I've just been on a roll as of late! Continuing this trend of wins are these FANTASTIC Mozzarella Stuffed Homemade Meatballs from "The Picky Palate". These are perfect for non-Italians or shameful Italians that never learned how to make meatballs (guilty). I'm not sure if these are the most authentic of meatballs, but they truly are scrumptious and an easy way to dress up your standard spaghetti night. I mean it's mozzarella baked into a meatball! How can you lose?! Ironically, this is the same blog that brought us the Oreo within a Chocolate Chip Cookie recipe so clearly something is working here with this food within a food concept. Without further delay, here is the recipe:
Mine


Hers. Sorry I can't keep plants alive. Photo from http://www.picky-palate.com/
Mozzarella Stuffed Homemade Meatballs
2 tablespoons extra virgin olive oil
1 pound lean ground beef
1 large egg
1/2 cup finely chopped white onion
1/2 cup Panko bread crumbs (*I didn't have Panko, I just used America's Choice Bread Crumbs)
1/2 cup fresh grated Parmesan cheese (*not fresh, oops!)
1/4 cup milk
2 tablespoons minced garlic
1 tablespoon Worcestershire sauce (*I used low sodium)
1 tablespoon yellow mustard (*Didn't have it in the fridge. Used Dijon instead)
1 teaspoon hot sauce, like Tabasco
1/2 teaspoon kosher salt
1/4 teaspoon freshly ground black pepper
1/4 teaspoon garlic salt
Ten 1-inch Mozzarella balls (*Couldn't find. Used four jumbo balls and just about halved them to make 9 meatballs in total. This is also a better option if you are on a budget-Mozzarella balls are not cheap!)

1.  Preheat oven to 35o degrees F. and grease 9×13-inch baking dish with oil.

2.  Place beef, egg, onion, bread crumbs, Parmesan, milk, garlic, Worcestershire, mustard, hot sauce, salt, pepper and garlic salt into a large mixing bowl, stirring until just combined.  Take 1/4 cup beef mixture and press into center with your thumb to make room for cheese ball.  Place cheese in middle then with hands enclose the cheese with the beef, making sure the cheese is completely covered.  Place meatballs into prepared baking dish and bake for 30 to 35 minutes, until cooked through.
Mix up all those ingredients.

Meatballs! (Before the good stuff)

The good stuff is inside (Thanks hubs for making them look pretty!)
Hot out of the oven!

3.  Serve over top your favorite pasta or inside a warm roll for delicious meatball sandwich.


Check out that cheese!
Pros: As we already know from my intro they are amazing! As my husband put it, "the flavor profile is perfect" (I think someone bumped his head and thinks he's Emeril now-or he's just getting really into the blog as well :) ). Another plus is that the recipe is really easy to follow and there's lots of room for revisions.

Cons: I found it hard to figure out how big to make the balls (ok I just laughed writing that-I seriously think I am actually a fifteen-year-old boy sometimes). 1/4 of a cup didn't seem the right size to make the mozzarella fit inside the meatballs.

Revisions: All of my ingredient revisions are written in the recipe. I am a huge believer (mostly because Bethanny Frankle is-I love her-guilty!) in using what you have especially if it isn't a huge component of the recipe. For instance, I didn't have yellow mustard and I was not about to run out and buy some because 1. I'm cheap and 2. We rarely use yellow mustard. So, I used Dijon instead. Just as good.
Next, if you're sensitive to onion (or have never cut a white onion before) use a food processor or be prepared for the water works! These are definitely the crying onion.
Also, and I know I sound like a broken record but, check your ovens! I found that 25 minutes baked and a few minutes broiled worked perfectly for this recipe and really browned the meatballs nicely. It depends on your oven. My husband noted that next time a drip tray under the meatballs on broil would work and allow for the grease to drip out leaving the bottom of the meatballs drier.

Total Meal: We ended up putting the meatballs over whole wheat rigatoni and canned marinara sauce that we warmed up on the stove and added in fresh basil, minced garlic, a few drops of Tabasco, and some of the leftover chopped white onion.

This one is most certainly a keeper. Try it out and let me know what you think and don't forget to go over to "The Picky Palate" and look at some of her other delicious recipes (so far she is 2 for 2 on this blog and both were "Hall of Famers!".

Cleaned plate = Happy cook.

Friday, January 13, 2012

Oreos + Cheesecake = Lurrvveee

Cookies and Cream Cheesecake Cupcakes (holy moley alliteration station!). But seriously, does anything sound sweeter than that?  I think the best part is that the recipe for these babies is shorter than their title.

This was my first recipe from Martha Stewart and accompanied my "Homemade Hostess Cupcakes" during my weekend up north of the Mason Dixon line, where my goal was to impress my family with my new found baking prowess. Needless to say between these two easy and divine recipes, it was an easy win for this baking beginner.

I couldn't seem to find the original recipe from good ol' Martha, but did find the recipe republished on this blog called "52 Cupcakes and Layla", which I'm obviously checking out again since it is all about delicious cupcakes! One thing to keep in mind is that this recipe does make 30, so unless you have an army to feed (or a family that has a serious sweet tooth), it is advisable to cut in half. Here it is:

Her's. Yummmm. Photo from http://www.52cupcakes.blogspot.com/


Mine. Not as firm, just as yummy.

Martha Stewart's Cookies and Cream Cheesecakes Recipe
Makes 30

Ingredients:
42 cream-filled sandwich cookies, such as Oreos, 30 left whole, and 12 coarsely chopped
2 pounds cream cheese, room temperature
1 cup sugar
1 tsp vanilla extract
4 large eggs, room temperature, lightly beaten
1 cup sour cream
Pinch of salt


1. Preheat oven to 275 degrees. Line standard muffin tins with paper liners. Place 1 whole cookie in the bottom of each lined cup.

2. With an electric mixer on medium high speed, beat cream cheese until smooth, scraping down sides of bowl as needed. Gradually add sugar, and beat until combined. Beat in vanilla.

3. Drizzle in eggs, a bit at a time, beating to combine and scraping down the sides of the bowl as needed. Beat in sour cream and salt. Stir in chopped cookies by hand.

4. Divide batter evenly among cookie-lined cups, filling each almost to the top. Bake, rotating pan halfway through, until filling is set, about 22 minutes. Transfer to wire racks to cool completely. Refrigerate at least 4 hours (or up to overnight). Remove from tins just before serving.

Pros: Scrumptious! The Oreo cookie bottom gives this cupcake a nice firm crust-like bottom and the cheesecake is smooth and creamy. It is the perfect combination of flavors and textures! Also, it is an easy way to eat cheesecake (no mess, no fuss, and best of all, no utensils!)

Cons: The recipe is pretty straight forward, but I did find it hard to figure out when to take out the cupcakes. I'm someone that needs explicit directions, and for some reason "firm" didn't do enough for me. Needless to say, they still turned out fantastic.

Revisions: I got nothing for ya!

This recipe definitely opened my eyes to why Martha is definitely a goddess amongst us mere baking mortals. She really is the real deal (even if she was apparently a terrible mother according to her daughter and that whole jail thing). The woman knows what she is talking about when it comes to cupcakes. Try them out and let me know how it goes! Is there any doubt that this is a "Hall of Fame" winner?

Tuesday, January 10, 2012

"Let's Get Chocolate Wasted!"

I am a sucker for catchy food names, so when I discovered this little gem for "Chocolate Wasted Cake", I knew I had to try it. I found the perfect excuse with my new job and my brother's first day at a new college.

This is a great multi-step cake for beginners and bakers looking to perfect their cake skills alike, plus it's a great recipe that allows you to use what you have in the pantry for the topping. (Hint hint all that leftover Christmas stocking candy...)

The recipe comes from "The Art of Dessert", a self-explanatory blog that I discovered thanks to Pinterest. This is my first recipe from this blog, and with the ease I found making this delectable dish, I will definitely be checking out future recipes. Let's get to the good stuff...

The Art of Dessert. A work of art. Photo from http://www.artofdesign.com/


Mine


Oh my.


Check out that drizzle. I ain't even complainin' about the mess
Chocolate Wasted CakeMakes 8-12 servings
Allergy Note: contains wheat and dairy ingredients
(See notes for allergen-friendly or vegan alternatives)

cake: 
3 cups all-purpose flour
2 1/2 cups sugar
1 cup cocoa powder
2 tsp. baking soda
1 tsp. salt
2 cups milk
1 cup butter, melted
4 tsp. honey
2 tsp. vanilla extract
1/2 cup semi-sweet chocolate chips

frosting:
4 cups powdered sugar, sifted
1 cup cocoa powder
1/2 cup butter, softened to room temperature
1/3-1/2 cup whole milk (start out with 1/3 cup of milk and add more milk to your desired consistency)
1 tsp. vanilla extract

liqueur for drizzling on the cake layers (i.e. chocolate, coffee or almond)

melted chocolate for drizzling, :
2 cups semi-sweet chocolate chips*
(* I didn't have enough chocolate chips, so I melted 4 Hershey's Bars instead)
2-3 Tbs. heavy cream or vegetable oil
semi-sweet chocolate chips for the sides of the cake

assorted chocolate candies for the top of the cake*

To make the cake:

(Note: Instead of milk, you can replace it with water or cooled brewed coffee. Instead of butter, you can use vegetable oil. Instead of honey, you can use corn syrup or agave nectar. Instead of semi-sweet chocolate chips, you can use Enjoy Life brand chocolate chips. For allergen-free alternatives for the candies, you can try Enjoy Life chocolate chips, bars or cookies)

Preheat oven to 325 F degrees. Grease and dust two 8-inch or 9-inch cake pans with cocoa powder. Set aside.

Sift together flour, sugar, cocoa powder, baking soda and salt. In a separate mixing bowl, combine milk, butter, honey and vanilla extract. Slowly add the dry ingredients into the milk/butter mixture. Mix until combined.  Fold in the semi-sweet chocolate chips. Pour in the batter into prepared cake pans. Bake for 30 to 45 minutes or until a toothpick inserted in the center comes out clean.  Remove from oven and wait for about 10 minutes to remove from cake pans and place on a cooling rack.  Allow to cool completely before decorating.


Mix the dry ingredients.


Mix the wet. I LOVE my brand new Mixer!


Add dry ingredients to wet. Mix till combined.

Baked cakes!


To make the frosting:

Note: instead of butter, you can use any allowed margarine, Spectrum organic vegetable shortening, or coconut oil.  Instead of milk, you can use rice milk or soy milk.

In a large mixing bowl, sift together powdered sugar and cocoa powder. Add the butter, milk and vanilla extract. Using an electric mixer, slowly mix together at a low speed. Once all the ingredients are combined, increase the speed and beat till fluffy.

It is so much easier mixing for 2-4 minutes without a hand mixer.
To assemble the cake:

Place the first cake layer on a plate or cake circle.  Lightly drizzle with liqueur.  Spread an even layer of frosting. Place the second cake layer on top of the frosting. Lightly drizzle with liqueur. Cover the sides and top of the cake with frosting.  Cover the sides of the cake with semi-sweet chocolate chips and cover the top with assorted chocolate candies. Drizzle the melted chocolate all over the top of the cake and let it drip down the sides of the cake.


Frosting the cake. (I'm not that good at making pretty desserts as we now know)


The final product post drizzle


(*I don't drink so I left out the liqueur completely. It's just as good and will still get you plenty wasted...chocolate wasted ;)

Pros: Did you see the pictures!? I think they speak for themselves. The cake is amazing and the recipe is very easy to follow. Also, the time it takes to bake the cake gives you the perfect time to prepare the frosting, get some dishes washed and out of the way, and prep for the decoration of the cake.

Cons: That it is going to force me to buy a bigger pair of pants. Other than that I have no qualms.

Revisions: My first revision was actually a mistake. I left out a stick of butter from the cake (oops), but it actually turned out just fine, it just finished baking sooner and wasn't as moist as if I had used the correct amount. Also, I left out the liqueur and used chocolate bars instead of chocolate chips, melted, for the drizzle. As far as the topping goes, I just used what I had, which included: mini marshmallows, tiny chocolate bars, M&M's, and crumbled double stuffed oreos. Ok now I'm hungry again.

This is a definite hall of famer. It will become your go to cake (although don't make my mistake and bake it for only three people!). So, get creative, use what you have for the topping, and get chocolate wasted!


Can we just take a moment to ooo and ahhh over my new mixer? I am seriously in love.

Saturday, January 7, 2012

Balsamic Bruschetta Chicken: First Hall of Fame Dinner Recipe!

This is my first recipe from "Budget Bytes" and I am shocked that it took me this long to blog about it. I am obsessed with Beth M, the creator of this magical site. I really am her #1 Foodie Fan. Her easy to follow, unique, delicious, and inexpensive recipes have totally upped the ante when it comes to my cooking. I have tried a bunch of her recipes and have only had one that was only "ok", the rest were fantastic. She also incorporates a lot of ingredients that you already have in the house so you are not running out to by 20 different items you'll never use again. Her blog is accessible and easy enough for beginner cooks while still providing tasty challenges for advanced cooks.

When I found out my grandparents were stopping in my neck of the woods on their way to the 6th borough of New York (aka the East Coast of Florida) for their winter hibernation, I knew I had to 1. show off my new found cooking prowess and 2. Cook something from Budget Bytes.
Hers. She makes a pretty presentation. Photo from Budgetbytes.blogspot.com


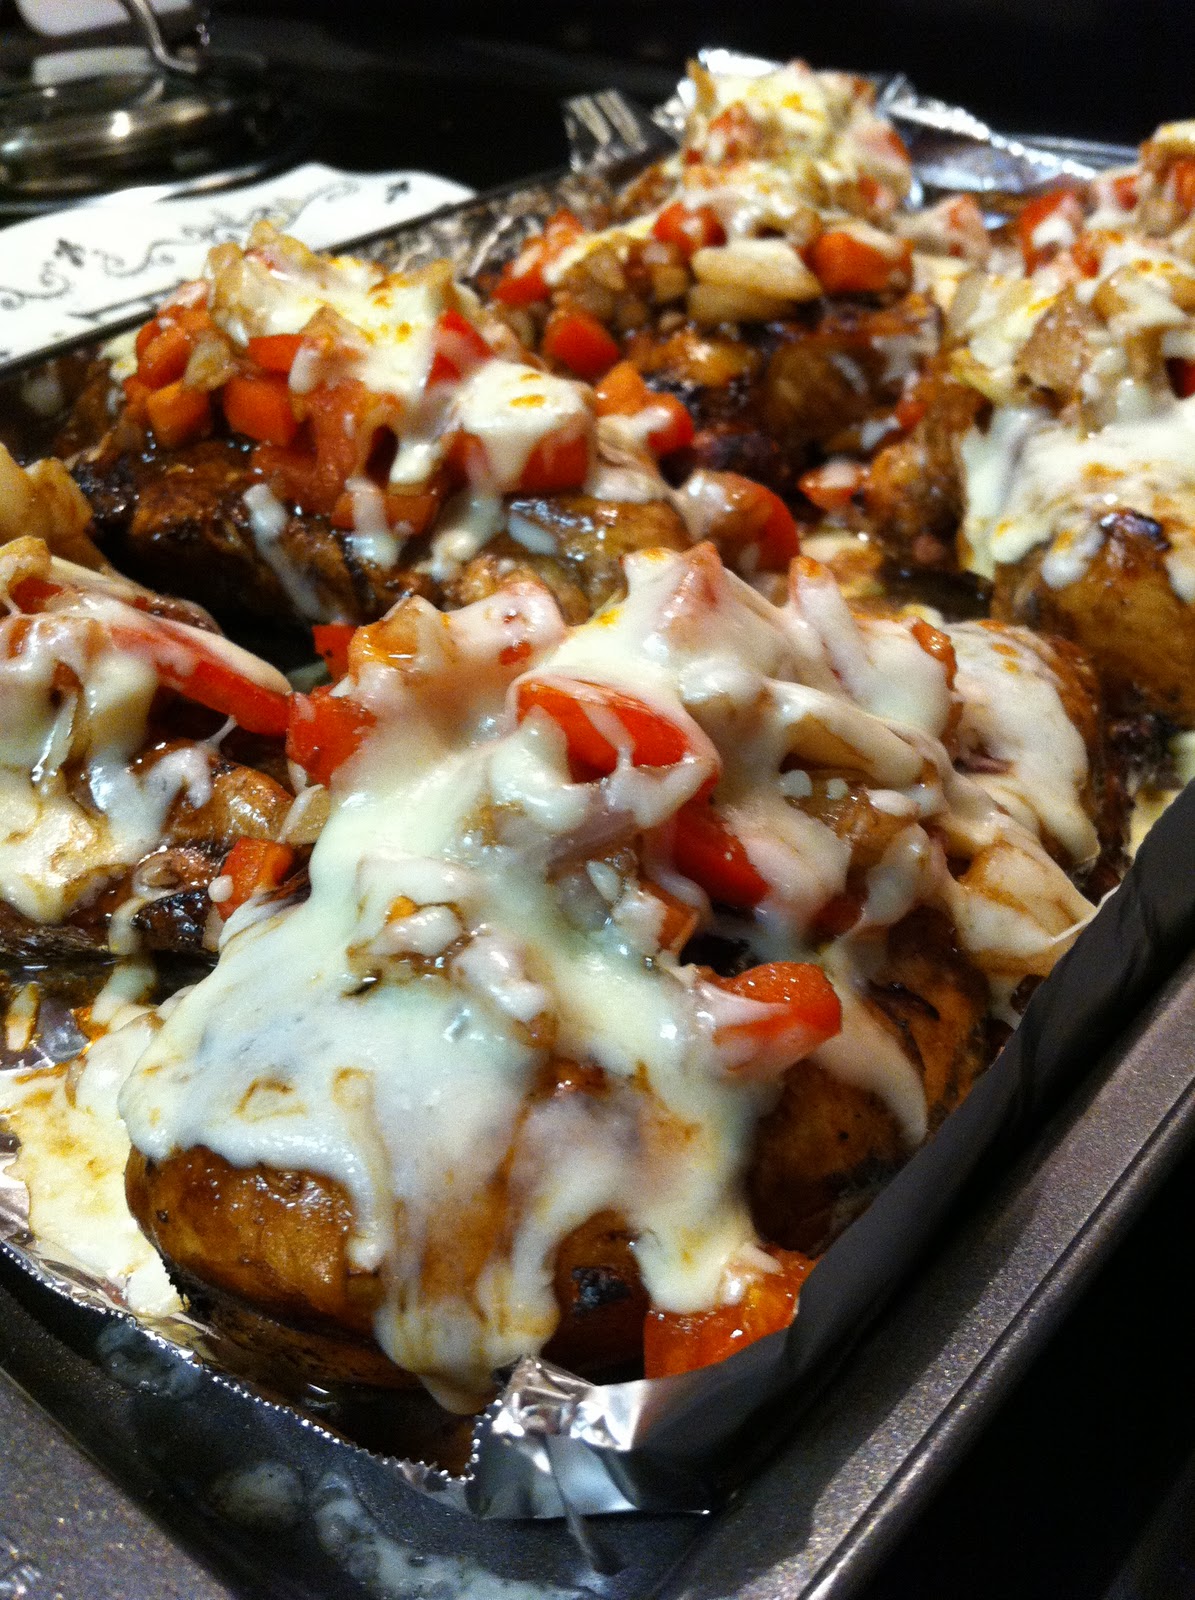
Mine

I decided on the Balsamic Bruschetta Chicken because it is savory, full of flavor, and basic enough that most everyone will enjoy the meal. The best part about it is that you can get the marinade out of the way in the morning and finish up the recipe in the evening, so it's definitely good for men and women with hectic schedules.

The recipe is below, but if you want to see the break down of price per ingredient, check out the full blog post here:

Balsamic Bruschetta Chicken
(recipe from Budget Bytes, photos are from personal stock)

Total Recipe cost: $6.75
Servings Per Recipe: 4
Cost per serving: $1.69
Prep time: 20 min. Cook time: 15 min. Total: 35 min.
Ingredients: 2 Lg chicken breasts, 1/4 C Balsamic Vinegar, 1/2 TBSP Olive Oil, 1/4 TSP minced garlic, a pinch of salt and pepper.

Bruschetta Topping: 4 medium Roma tomatos, 1/2 medium Vidalia (sweet) onion, 1 TSP minced garlic, 2 TBSP Balsamic Vinegar, 1 TBSP Olive Oil, salt and pepper to taste, 1 C of shredded mozzarella.

STEP 1: Trim the excess fat from the chicken breasts and cut each piece into two. Cover the chicken with plastic wrap and pound the pieces down to one inch in thickness (use a rolling pin or heavy pan to pound).

Individual chicken breasts and lots of 'em!

STEP 2: Place the chicken pieces in a container or zip top bag along with 1/4 cup balsamic vinegar, 1/2 Tbsp olive oil, 1/4 tsp minced garlic (or one clove if using fresh), and a healthy pinch of salt and pepper. Mix everything around to make sure the chicken is coated in the marinade. Refrigerate until ready to cook.


Soaking up the marinade
STEP 3: Prepare the bruschetta topping. Finely dice the onion and tomatoes. Combine them in a bowl with the minced garlic, balsamic vinegar, and olive oil. Stir well, taste, and add salt and pepper to your liking (I like generous salt in this mix, about 1/2 tsp).


Topping (I tripled the recipe)

STEP 4: Grill the chicken until cooked through (I used my countertop grill, it only took 5 minutes). Turn the oven on to broil and adjust the rack so that is about 6 inches below the heating element.

STEP 5: Place the grilled chicken pieces on a baking sheet covered with foil. Top each piece of chicken with about 1/4 cup of the tomato bruschetta topping and about 1/4 cup of shredded cheese. It's okay if some falls off, you can scoop it onto your plate along with the chicken. Place the baking sheet in the oven under the broiler. Cook just until the cheese is fully melted (5-10 minutes). Serve hot!

Pre Oven


Out of the broiler. Check out that cheese!

Pros: YUM YUM YUM! This recipe is so fresh and the flavors balance each other out perfectly. Also, the recipe is super easy to follow along with.

Cons: Can't think of anything really.

Revisions: Instead of getting 2LG chicken breasts, we just got individual chicken breasts, pounded them out a bit, and after the marinade, put them on a charcoal grill. (I'm a big believer everything tastes better on a real grill, but you could do it either way). Also, keep an eye on your broiler! The first time I made this, I didn't check on my chicken till 5 minutes in and the cheese had already started to burn. This time under my more careful eye, it only took 2-3 minutes until the cheese on top was gooey and melted and ready to come out.

I know this is redundant, but I really love Budget Bytes. I just think it is one of those food blogs, out of so many unnecessary food blogs out there (possibly this one included?) that really satisfies a need that many people have; to find an inexpensive, healthy way to cook. And not only that, but a way to cook that is satisfying and tastes good.

Needless to say, this was a Hall of Fame recipient. It got the seal of approval from my grandparent's and the cleaned plates were the greatest compliment for this beginner chef.


They like it, they really like it!